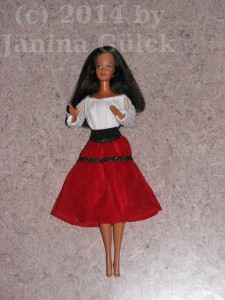
Finally a Japan body

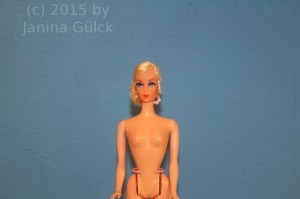
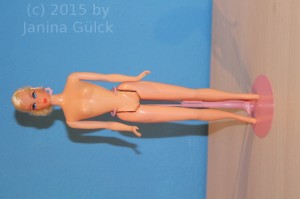
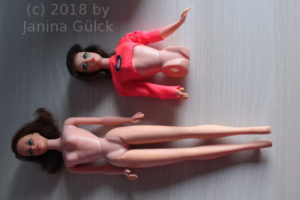
Several years ago I got in different lots a  Twist n Turn Japan body (from 1967) and in another one the right head. I restored the doll down to her waist but the legs of the body had bite marks and the joint was coming out of the knee. In the last weeks I was lucky enough to find the right body with good legs. So in the next weeks I can finally finish a repair project that lasted several years. It’s good to know that my search has come to an end.

I will tape how to clean the MOD Barbie and how to do the rest that two dolls become one.

MOD TnT Barbie


Wannabe restorers

I’m back from my vacation and want to talk to you about a serious topic. Again I heard from a case of bad work. I can only warn you. When you want somebody to restore something for your collection, check at least twice. You can never be careful enough. The best advice I can give you is to inform yourself how things are done and then ask the concerning person questions how to do this or that. Then you might be able to check if he/she understands the work. When I’m asked for advice I always tell people that there is a risk when you restore something. You don’t know how things were stored from the owner. The material doesn’t tell from the first sight. Of course the material can change and you don’t know it. It’s always your risk when you restore something.

Concerning a reroot it looks like this…

If the restorer tells you that big holes in the head are normal, think about asking another person to do it.


How does a Barbie knee joint work?

For all who always wanted to know how a knee joint works but never damaged a Barbie doll to find it out, here is the result. (I already got the doll with the broken knee joint.) I haven’t  destroyed the doll myself.   I think the pics explain how the position is held and why we can bent the knee joint three times.

The problem with green ears and modern Collector Barbie

I don’t know whether anyone of you knows the problem but I assume you do. I bought Collector Barbie dolls for many years and for some reason I don’t know some of them developed green ears.  I have to say I don’t like green ears at all. I know it has been a problem for decades. I the first owner of some of the Collector Barbie and I stored them all the same way. This is what I did when I saw green ears. At first I removed the earrings from the doll. Most of them had no hooks at the end in the head. So it was easy to remove them. Then I cleaned them with a cloth for costume jewelry. After that I put them in a tiny plastic bag to be sure that the earrings don’t stain the clothes.  I put one of these little silicone bags inside the box before I put the box with the doll in my shelf. Then I forgot about the issue. When I looked into the box again….surprise the green was gone. This is so strange. I really did nothing and now it’s gone. I realized the green in an early stage.

Maybe this makes a difference!? I hope my post can help anyone.

What to do when the hair is sticky… problems with Superstar Barbie

Maybe some of you had the problem of sticky hairs. Barbie dolls from the 1980s often have this problem. Sometimes even when they are NRFB. The cause for the stickiness is the softener that is contained in every doll head. I have no idea why and I’m not good in Chemistry but I know that it (the softener) managed to get from the head into the hair. The good news is that you can get rid of the stickiness. It’s no problem. At first all you need is a bowl with lukewarm water, normal hair shampoo (the brand doesn’t matter) and conditioner. Dip the the head of the doll into the bowl. When the hair is wet put a mixture of shampoo and conditioner mixed together in one of you palms and massage it softly in her hair. Then put the hair in the bowl. The important thing is that the hair has to be in the bowl for at least twelve hours. For the next step you need a big cooking pot. Fill it with water, put it on the stove and switch it on. Wait until the water is cooking. Then put the hair and the head in there for 5 minutes. Insure yourself that the hair doesn’t touch the walls of your cooking pot. It’s going to melt when it does touch the walls of your cooking pot.  After that you can remove the the head from your cooking pot. Use a guest towel for the drying process. Put the doll towel and wait until the hair is dry. Then the stickiness should be gone. If not, repeat the process for a second time.  My doll needed the process two times.

Please consider that you should only do the process with dolls from the 1980s. When you do it with Fashionistas the result might be that your doll is bold. The method of how the hair is fixed inside has changed in the last decade.

Another repaired Talking Barbie

I recently found the time to finish another repair. I think I got her two years ago but somehow I forgot that I had prepaired everything last summer. I only needed legs and I found them two months ago. So here she is… a nape curl Talking Barbie repaired to speak. This was my first repaired Talking Barbie doll. I already have repaired a Talking PJ and a Talking Truly.

IMG_3444

IMG_3445

Another finished project

In the last months I was lucky enough to find a body for one of my rerooted heads. I rerooted the head approx. 2 years ago. I know a long time…and I had almost forgotten my head. I did another reroot in the last months and then I found my project again. At first I was unsure what kind of body to use for my project. Finally I decided to use a Cool Colours Barbie body. Here’s the result. Hope you like.

IMG_3404

IMG 3405

IMG 3406

IMG 3408

IMG 3409

My finished Ooak project

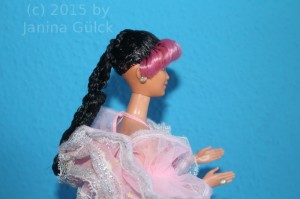
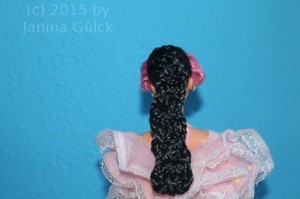
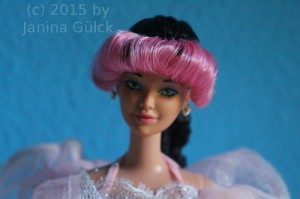
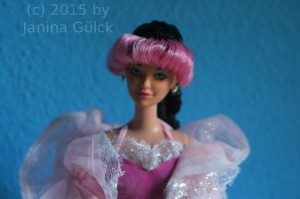
Today I finished my Ooak project. In March I got a Kira/Marina head with a haircut. Somehow she was cute and I decided to restore her. The first step was to remove the hair and give her new hair. I decided for black and pink because I wanted to do a reroot in two colours. I wanted to do a very elegant hair style for her long hair and decided to do the “Arwen”-hairstyle with 9 strands that was not shown in LOTR(Lord of the Rings).  Then she needed a new body. Her body was broken. During her hairstyling I was looking for a new body and by the end of May I finally found one. When she had a new body I was able to restyle her bangs. You need a body when you want a short pony.

When her hairstyle was finally finished I started to repaint the eyebrows. 50% of the colour was gone. So I repainted the brows and had to wait several weeks for stains that appeared in the repainting process. I used a cream to bleach them. They were gone last Thursday.

Yesterday I started the final styling of her bangs and finished it today. Then she got her jewelry, earrings and a ring.

I wanted to make her look like a mixture from 80s and 90s so that she reminded me of my childhood with the giant bangs. Now she’s ready for her great entrance.
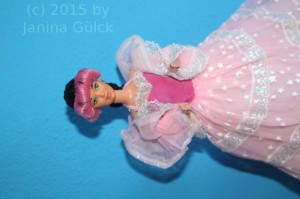
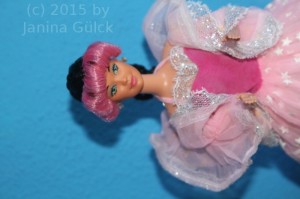
two tone Kira head

Close up from the head

My latest piece of art

The hairstyle

The bangs

The ensemble

And this is a pic of the head before I started to work.
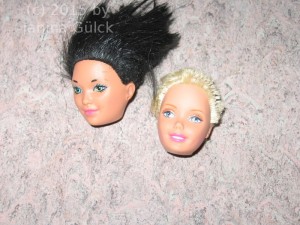
The head before ... cut hair and 50% of the eyebrows are missing

The right head also got new hair in the meantime but this will be another Ooak project. I’m still looking for a new body. I’m going to show you more in my next post.
One of my Superstar-Reroots

I haven’t posted very much in the last weeks. Now I’m going to change this. I wanted to show you one of my Superstar-Reroots. I did in 2012 I think. I ‘m a fan of  red haired Barbie dolls but in 1977 there were no red haired Superstars and I wondered what she would look like. And here is my result.

Superstar Reroot

Superstar Reroot

Superstar Reroot in red

Superstar Reroot

I have chosen a color called “Oxided Julia” for my reroot that had pink streaks in the red hair. I don’t think it has anything in common with the Color Magic Hair that was used for Julia in the late 1960s but I saw that it tended to turn from black  into a reddish tone. For the hair style I chose rope braids. They are easy  but you have lots of possibilities to work with them. The dress is a Best Buy dress from the late 1970s. I saw it and I thought it would match perfectly.

I managed it!!!

Finally after several weeks I can present you the latest success of my decoloration experiment. When I got this dress the blouse had several red areas. I suppose in the past the dress became wet and so the red skirt was marking off. With a little effort I managed to bleach it. Here is my result. It’s good, isn’t it?

Rio