Exploring the Hidden Treasures: More Congost Barbie Dolls

Introduction: More Congost Barbie

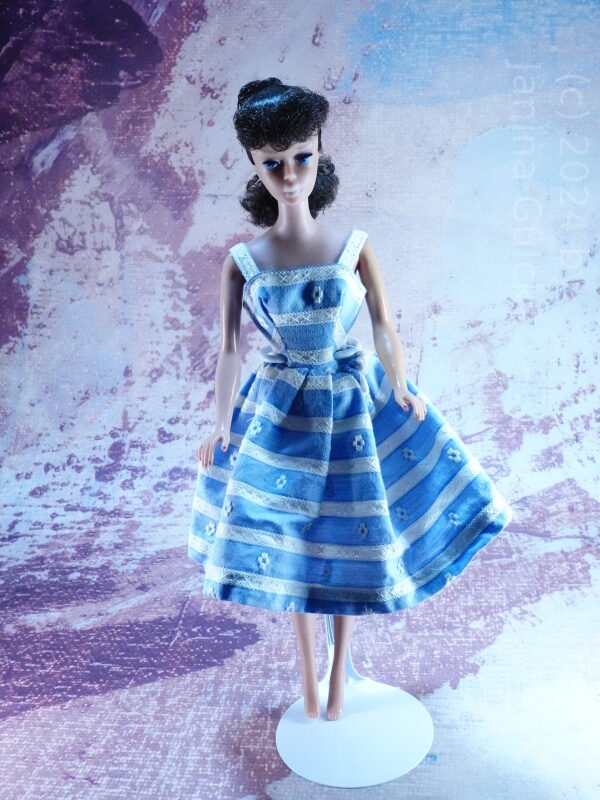
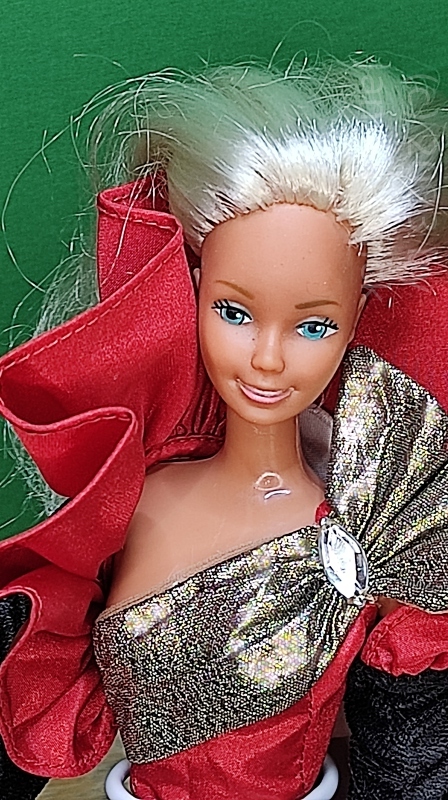
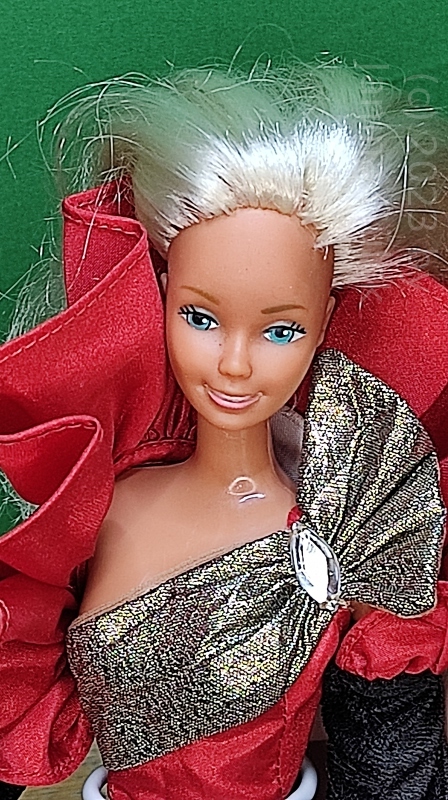
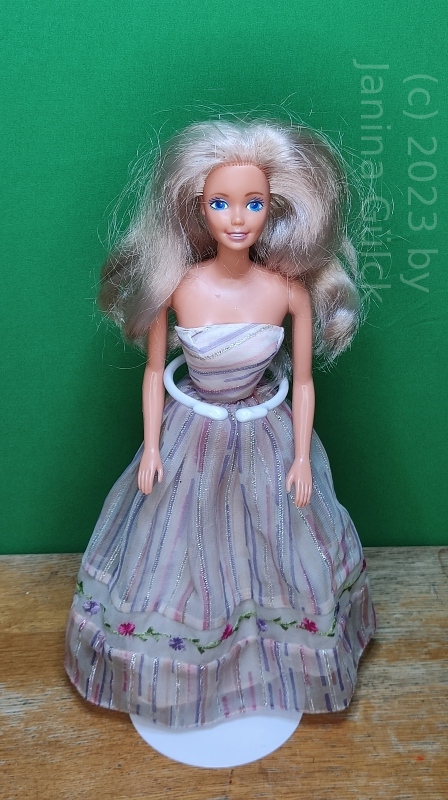
In the world of Barbie dolls, collectors are always on the lookout for rare and unique finds. Today, we delve deeper into the captivating realm of Congost Barbie dolls, showcasing a few gems that you may not have seen before. These hidden treasures from Spain, produced by Congost under license due to Mattel’s limited production capacity, offer a fascinating glimpse into the world of Spanish Barbie dolls. Join us as we embark on a journey to discover these exquisite dolls and learn more about their captivating history. There are more Congost Barbie dolls than you might imagine.

1. Unveiling the Spanish Beauties:

In our previous blog post, we introduced you to some of the remarkable Congost Barbie dolls. However, our collection extends beyond that, with even more dolls waiting to be explored. These dolls have a distinct charm that sets them apart from the rest but they tend to loose their hair or have vanishing Make up. That’s at least a sign that you have a Congost Barbie in front of you.

2. The Story Behind Congost Barbie Dolls:

Congost, a Spanish company, began producing Barbie dolls under license from Mattel when the demand for these iconic dolls grew after the death of Franco beyond Mattel’s production capacity. This collaboration allowed Congost to create unique Barbie dolls that catered to the Spanish market, highlighting their cultural diversity and aesthetic preferences. Although a huge part of the population in Spain is black haired or brunette, Barbie dolls were almost always available as blonde version. Link to the first article about Congost Barbie https://barbie.final-memory.org/the-enigmatic-spanish-barbie-dolls-from-congost-unraveling-the-untold-story/(opens in a new tab)

3. Identifying the Hidden Treasures:

As we present these additional Congost Barbie dolls, we invite you to join us in identifying and appreciating their distinctive features. Through your help and expertise, we can shed more light on these dolls, further enriching our understanding and appreciation for Spanish Barbie dolls. At first I thought I had almost all Barbie dolls from Congost until I found more Congost Barbie dolls on a certain platform. By the way here’s one more of them https://barbielistholland.wordpress.com/2014/10/18/1959-2014-fityfive-years-big-changes-of-the-barbie-doll-part-i/1978-congost-superstar-barbie-casino-doll-nrfb-mib-spain/

4. A Glimpse into Spanish Barbie Fashion:

One of the most captivating aspects of Congost Barbie dolls is their fashion. Reflecting the vibrant Spanish culture, these dolls don exquisite ensembles that showcase the country’s rich heritage. We see here a lot of variation from the normal Barbie dolls made for the US- and European market which were unknown to almost all of us but the ones being in Spain in that time for vacation. From Alta Coutura dresses to traditional regional costumes, each outfit tells a unique story and adds to the allure of these dolls.

5. Collecting more Congost Barbie Dolls:

For avid Barbie collectors, uncovering these hidden treasures can be a thrilling experience. Whether you are a seasoned collector or a novice enthusiast, these rare Congost dolls offer an exciting addition to any Barbie collection. Their scarcity and unique designs make them highly sought after among collectors worldwide. Due to a quality not as good as the US version Barbie dolls a lot of them did not survive the millenium. That’s at least what I was told when asking a friend with an apartment in Spain.

Conclusion:

In our quest to explore the world of Barbie dolls, we’ve discovered the enchanting realm of Congost Barbie dolls. These hidden treasures from Spain, produced under license by Congost due to Mattel’s limited production capacity, captivate collectors with their distinctive charm and exquisite fashion. With your help, we can further identify and appreciate these Spanish Barbie dolls, adding to our knowledge and enjoyment of this fascinating hobby. Embark on this journey with us and uncover the beauty of Congost Barbie dolls, a testament to the allure of the Barbie universe.

The leg repair of an Equestrienne Barbie

Last week I told you a little bit about the leg repair of a Talking Stacey and how easy it is to repair her fallen of legs. If you forgot to read about you can do it here https://barbie.final-memory.org/talking-barbie-and-her-leg-problem/

C1397T01
Successful leg repair of an Equestrienne Barbie

This weeks I would like to tell you a little bit about the leg repair of an Equestrienne Barbie and how easy her repair really is. I have done a video about this topic many many years ago when starting to do videos but until then no second Equestrienne Barbie crossed my way to do the repair another time. However I realized I got a pair of legs and a suitable body for the demonstration of this repair in the last months, had forgotten it completely.

C1390T01
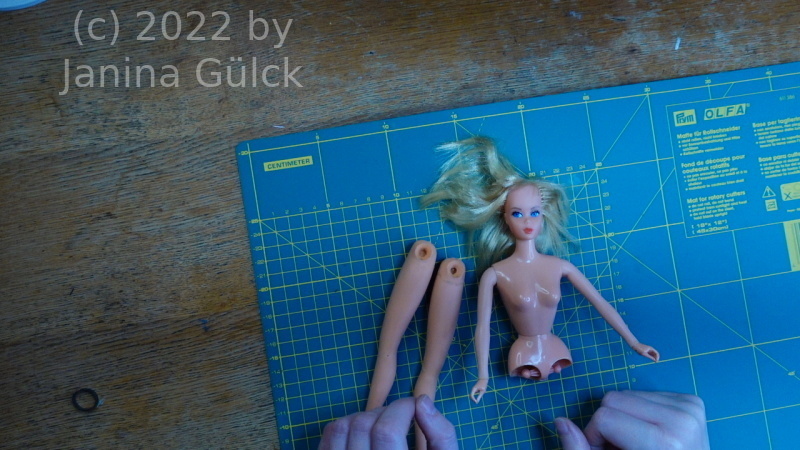
That’s Barbie without legs

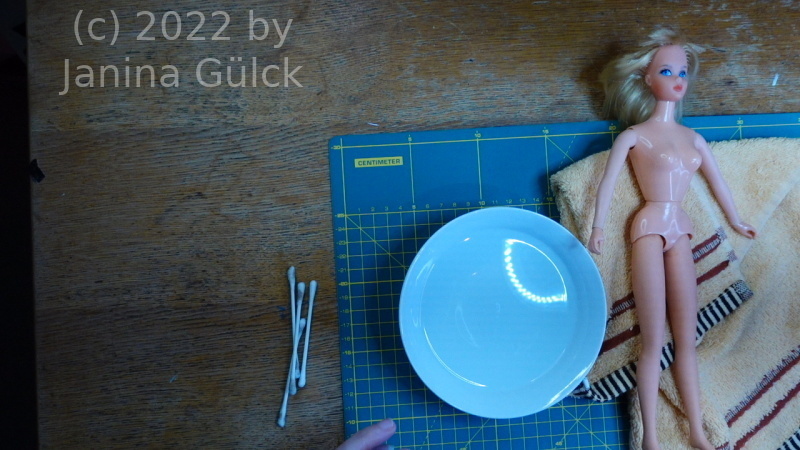
When searching in my workshop for new video ideas I found the semi-assembled Equestrienne Barbie just waiting for me. She was the one I was looking for. The good thing is that for this kind of Barbie doll the amount of time needed for the repair is very low. You can do it within 5 minutes when you are trained to do it. This is no joke. You don’t need more time for the leg repair of an Equestrienne Barbie. It’s very simple. You just need hot water, the legs, a little towel, the upper body and some minutes time.

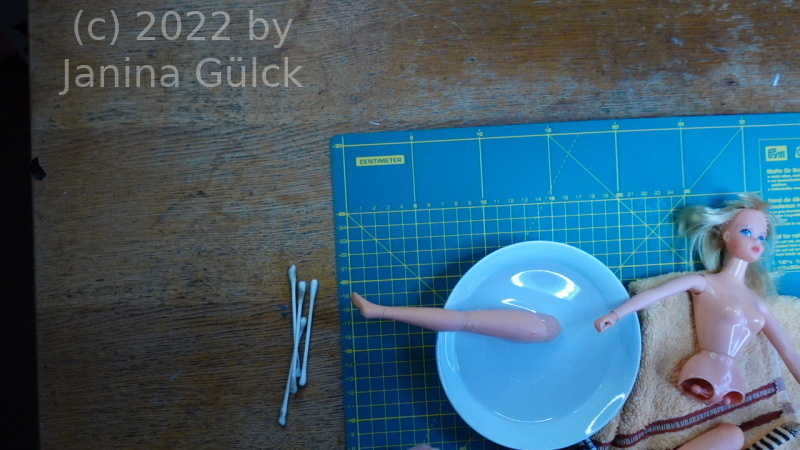
After putting the legs in your bowl with hot water you just need to wait until they become soft. You dry them with a towel. You know the problem that can appear when not doing it properly. Read more about it here https://barbie.final-memory.org/tutti-todd-and-their-problems/

C1396T01
Here we are in the middle of the repair

You dry the legs and them push them over the joints with some feeling. It’s really hard to explain how much to push and how much is too much. I suggest simply trying the leg repair of an Equestrienne Barbie. More than not being able to get the leg in the leg joint again can’t happen. Then you do it another time and it will find its way.

C1395T01
One leg reattached …

How to repair Plush Pony from 1969

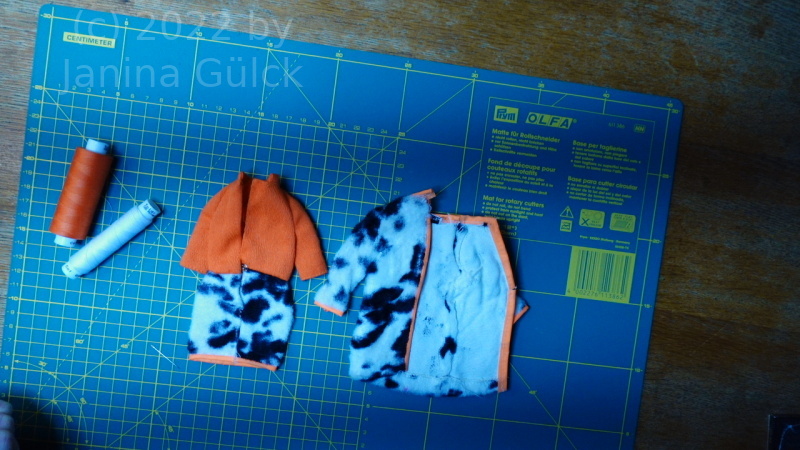
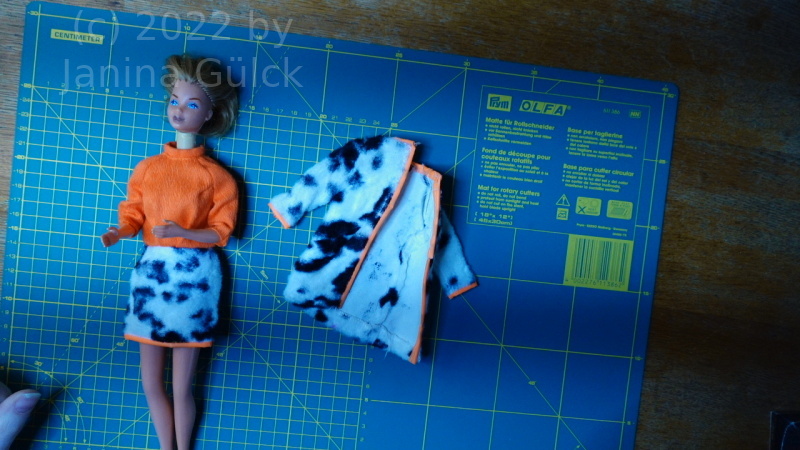
Maybe some of you remember this outfit from the late 60s. It’s very modern and it’s called Plush Pony. Somehow this outfit reminds me of a cow skin with the black spots. I have to tell you this here. Plush Pony mainly consists of the colors black, white and orange. Today I would like to talk a little bit about how to repair Plush Pony from 1969. This is an outfit worth to be repaired.

Another collector sold this outfit to me as project for repair. You know every now and then I get the chance to buy the broken outfits for a low and this is the case here. The seller is one of my silent admirers. In the last weeks I finally found the time to repair it. It was on my to do list for the last months but I hadn’t done it earlier. I need some positive vibration when doing this. I hate to do it when I’m under time pressure. That’s one of the worst things you can do when repairing a doll.

C1273T01
Barbie Plush Pony

The things that expect me were the age. The trim became stiff within the 50 years of it’s existence. That was the hardest problem to deal with due its stiffness. So I decided to my best to get it back on the fabric. The repair of the dress was easier. It had a common problem with open seams.

C1278T01
Kissing Barbie wearing Plush Pony

At the end I was able to fix this outfit. I don’t know if this trim was stiff from the beginning but I dealt with it the best way I could. The Kissing Barbie you see here was another repair project I did last autumn but I forgot to blog about her due to a lack of time.

Broken Barbie necks, missing joints and how to attack this wide spread problem

When I come across problems with broken Barbie necks there are mainly two things, very wide spread in this area. One thing is that you can find the older neck joints very often in the head of the dolls. They simply left the body and popped somehow into the head.

That’s also the first problem I ever came across when I kept my childhood dolls, got them from the attic a while ago and one of my Skippers hit the floor. So the problem that the neck joint disappeared into the head happened. The head fell off and I thought she would really be broken. I think it happened some 20 years ago. I really thought she was broken and threw her away. To be honest this was one of the biggest mistakes I ever made since starting to collect these dolls. There were no guides or indications that simply hot water would have saved this Camp Fun Skipper to be thrown away. I learned all the things that I teach you here much later. Another Skipper, my Teen Skipper was sitting for years on a stair head. One day she fell of. The head, the joint and and the body stayed intact. The only thing she got from this adventure during my absence is a very thin hairline crack. I know she has it but I ignore it and nothing will happen. She’s in one of my showcases.

But what to do when you have a case like mine? Throwing the doll away? Possible but unnecessary as I learned later. There’s a very easy solution to get at least the neck joint out of the head again. You only need a bowl with hot water, a towel and a little patience to get the joint out of the head again. The head itself is made out of rubber. When you heat it up a little bit the head becomes very flexible and it is very easy to get the joint out of the head again. That’s what you can see in the first part of the video. I recommend not to treat the broken hairline cracks if you want them to stay invisible. Often you hardly see that there are cracks when the head is back on.

What do you do when a big part of the neck is broken smoothly out of the neck? Does it make sense to throw the doll away then?

I would say no. If you don’t have the stuff to repair the body immediately it’s no problem just store the broken out piece and the body together so that you know where the body as a whole is. Maybe store it in a zip lock bag?

Good idea! That’s at least an idea how to fight against broken Barbie necks, missing joints and a solution to attack this wide spread problem. But when you want to leave this ” I put her in a zip lock bag” -status? That’s very easy said with a few words. Get yourself MEK to solve this problem. The background why not to use normal glue is that I was told by a lot of collectors that they got problems with using glue. Their arm and neck joints literally crumbled away within the years the dolls were glued. That’s why I recommend to melt it back on. MEK or 2 Butanon is a solvent. We careful when using it. It is said that this stuff can lead to cancer when using it too often. It also needs 24 hours to dry completely but I think it’s okay when we have a normal doll back after the time. For the missing joints I can recommend to replace them. Often you find replacement joints in bundles/ lots with lots of heads. In the last year it was no problem to get them. What do you think? Let me know in the comments.

The top repairs of 2021

Well, this year is over and it’s time to have a look back what happened in 2021. We had a lot of projects in 2021. Some of the projects were bigger and some of the projects were smaller. We had for example the problem with sticky legs. Sticky legs occur from time to time and especially when you store your dolls in different climatic conditions. Sometimes it’s just a matter of the production.

In February we covered the reroot of a Ponytail Swirl Barbie and repaired a Suburban Shopper with a big hole.

We also did some repaint work at a Spanish Barbie doll.

The last big project was the creation of a No Bangs Francie. Francie had no hair and we completely restored her hair including her legendary curl.

The Barbie doll wiki: Things to use for Barbie repair – Talking Barbie

In this article I’d like to tell you a little bit about Talking Barbie repair. I know many collectors search for information about Talking Barbie repair. I’ve done it several times. It’s not the hardest thing to do but you need dexterity, prestidigitation and patience. Of course you should also know what to do in the repair before you do your first one.

Before you do your first repair you need some useful equipment. You need governor belts in the right size, the right replacement for the pullstring, the right ferrules to reattach the flower. Some tools are useful for the repair too like tweezers, cotton balls, rubbing alcohol, disposable gloves, locking forceps and package tied. Some acrylic color in the right skin tone is also useful later after the repair.

You see before you can do anything you have to invest some money. Some collectors told me that they just tried to repair the doll without any knowledge and damaged the mechanism so badly that some of them threw the dolls away. I don’t recommend it. Before you do anything become familiar with the repair. I’ve done some videos while I repaired a Talking Barbie.

The range of my videos goes from the buy or not buy decision to the cleaning of the mechanism to the repair itself and then about how to reseal the body again and reattach the limbs again.

Don’t expect that the cleaning is a fast thing to do. It can last several hours depending on the leftovers of the governor belt itself. I’ve had some easy to clean dolls and some weren’t that easy to clean. Some Talking dolls are cooperative and others don’t.

One of my first Talking Barbie was not cooperative. I tested her for days and got not the right speed for the record. I almost became mad but I found a solution for the problem. The easiest Talking doll I repaired was a Talking PJ. She started almost immediately to talk after I did the test. The mechanism itself is kind of engineering art. It’s done in a very clever way.

If there are no injuries from the outside the mechanism can hardly be destroyed but by a father with a screw. The only weak point is the leg knob. The legs tend to fall of the body but only Talking Barbie I heard it from later produced 1970s Barbie dolls too. They all can be repaired with my method.

I’m not sure why this problem is there so often but maybe it’s because of the production process or maybe the attached legs exerted too much pressure to the knobs so that they just broke. I’m not an expert but I try to find the why.

The repair is not impossible

Due to problem that many collectors try to do the repair just so, I decided to do a video series that they realize where the problem is. It’s all about the right technique and the knowledge how to do it right. There’s no need just to destroy the doll just because you want to see what’s inside the upper body.

I’m not a fan of such actions. That’s one of my reasons to make this video.

Barbie doll wiki : Things to use for Barbie repair – the little green ears

In my next article I’d like to continue where I stopped last week with the hair topic. Repair is not limited to hair. There are other problems every collector has to deal with like green ears.

The awful green ears

I think there’s almost nobody out there who doesn’t know the problem – green ears – just awfuuuuuuuuuuuuul. It’s not only a problem of Vintage Barbie limited to the years 1959 until 1967. Nope, that’s also a problem of modern collector Barbie dolls with earrings. By the way the problem exists in the human world too. When you buy earrings but not made out of silver or gold, you buy the problem. Costume jewelry earrings tend to have this problem because the metal reacts with our skin. We can’t exclude to sweat or transpire. As long as we do so the problem will occur. In the case of Barbie it’s similar. She can’t sweat but the rubber of the head is/was in permanent contact with the earrings. I don’t know exactly what the early earrings with the pearl ends were made of. I guess it was copper or a similar metal because copper tends to show green discolorations after a while. Think of church roofs. In Germany we have many clock towers roofs or bell towers roofs made out of copper.

Why green ears appear

I think the copper reaction works like this … when the roofs are exposed to nature for a while with sunshine, rain, snow, hail, frost and wind the copper reacts with all the wheather influences. It seems that it’s very a similar thing with the Barbie earrings. The reaction doesn’t come immediately but after a while. Let’s say the child stopped to play with her early Barbie and the Barbie was stored in a garage or on an attic, not really exposed to the elements but let’s say the roof is not well isolated and when there is frost the doll also is exposed to it. Frost has to do with water that changed its physical state then we should have no doubts that the reaction of the earrings comes from the water/humidity on the attic. These early earrings were not tested for any green effects on dolls. As I read again today it was all a matter of costs. It was easy to produce in Japan because the wages were low after WWII there. When we guess they used cheap earrings it’s very clear why the phenomenon appears. They used cheap metal. In the early years Barbie was just produced as a toy, not considered for collectors.

How we can solve the problem and treat the ears

Now that we know the reason why the green ears appear, we can solve the problem. Nevertheless the biggest problem is that Mattel used different chemical mixtures for the heads. It seems that the material changed a bit from doll to doll. Bubble Cut Barbie dolls are easy to cure. When you want to learn how to fix them just buy Clearasil cream and smear it onto the ears and put the doll in the sun. The more sun, the better.

With Ponytail Swirl Barbie dolls it’s another story. Although I’m no chemist I assume that the material is different. Why? I tested it and I got a great Ponytail Swirl with original hair do but she had green ears. I wanted to treat her. Result? The procedure lasted more than two summers. In the first one I hardly put her outside on my balcony because I was afraid of forgetting her. In 2017 my Bubble Cut head was stolen by a bird after forgetting it on the balcony over night. That was not what I wanted for my Ponytail Swirl. So sad if she had been stolen. My plan this year was to put her outside in the sun but only for the time I was at home. My first test last year contained Clearasil cream, Benzaknen ( a cream for acne treatment with 10% peroxid for bleaching available in Germany), Remove Zit. I stared with Clearsil and then came to the idea that Clearsil does not work here. So I changed to Benzaknen, had to stop my test during the winter and wait for spring since the winter here is always very foggy and sunless. This spring I put her in the sun with fresh Benzanknen, changed it every day but I had only little success. I wanted to use Remove Zit as well but the summer was over before I had the time to do so. From my experiences on Superstar Barbie I can say that Zit leaves ugly stains. You need another chemical counterpart to get rid of the stains. That’s why I’m careful with Remove Zit.

That was the first video I made about the Ponytail Swirl green ear problem but had no idea that it would last that long to cure her. In the meantime I removed the green ears. A hint from another collector helped. She used Poliboy Gold & Silberbad for her head and the green ears vanished within 14 days. I had similar success. One of my books recommend Haggerty Silver bath for the treatment. Two products available in different countries under different names? Other collectors from the USA have reported that they use CLR (Calcium Lime Rust remover) with the old formula and had success too. A video with my results is planned in the next weeks about my success. I still have to do some X-mas present preparations before I can come back and do full time video cutting.

Problems with the availability of products

I heard from some other collectors that not all products I refered to in this article are globally available. We can e.g. buy liquids like CLR only with a ton of difficulties. We have to pay for shipment, go to the donahue and pay VAT. The limit to import goods for free ends at 22 € including shipping. Poliboy is not available in the USA. That’s why I double checked my books and found Haggerty. Maybe the information is useful to some of you. Remove Zit is hard to get in Germany and the dealer want very much money for it. I got mine several years ago and paid around 30€ . The best before date is soon after you buy it. There’s no label with ingredients on the box.

How to get rid of the problem

Remove the earrings from the head. Treat the head like described above. Some collectors use transparent nail polish before they use the earrings again and paint them with nail polish so that the head and the earring have no contact with each other. You can just let them out and put them on the doll stand.

When a modern Collector Barbie has signs of green ears, remove the earrings and put them in a little bag. Try to avoid contact with the clothing of the doll. I put them in little zipper plastic bags in the box of the doll. Don’t treat the dolls, just let them rest in their boxes. The green often vanishes itself without any procedure. I’ve done a video on this topic too.

When you’re a collector of LEO India Barbie dolls, this information is helpful to you too. I recommend to remove the earrings of Indian Barbie dolls as well because the golden earrings are made of some real metal that can cause pale heads. Only a few collectors know about the problem. Whenever you get Barbie dolls from India take the earrings out.

New Barbie and Barbie body projects

Can you imagine that you find yourself in a maze and don’t know how to get out? That’s how I feel sometimes when I get new parcels for new projects.

  • In a positive way you can leave your every day life behind you for a while and spend time with Barbie dolls.
  • It can also feel a little bit like “Hey, there’s so much work to do.Why don’t you move your ass?”
  • Sometimes I also feel like a gold digger from the last gold rush, you know somebody who can’t stop to work because when you don’t work today you don’t have anything to eat tomorrow. ( I know a strange imagination)
  • What makes it even harder is the fact that I’m still looking for a full time job (I wonder if there is the right job somewhere for me. The last job interviews were rather deterrent than inviting)
  • Hey but nevertheless I continue working on my projects and on new videos, guys. Do you know these feelings?
  • I have a new lot that I’d like to show you . Here are some pics for my new Barbie and Barbie body projects …
Sieh dir diesen Beitrag auf Instagram an

Here’s one of my new #barbieproject, a #tntbarbie from #1967barbie that I’m going to #restore. Does anyone of you know the name of the #barbiehaircolor? #Happy to hear from you #love #busybfromgermany #barbiedoctor #barbiedoctora today with a #modbarbie #barbiemod

Ein Beitrag geteilt von Busy B from Germany (@busybfromgermany) am

Sieh dir diesen Beitrag auf Instagram an

These two #standardbarbiedoll (s) from Europe were also in the lot. I want to see if a #barbiehack I heard about in the last months really works or not. #staytune if it works or not. Be surprised what #busybfromgermany plans with theses #70sbarbie dolls. #barbiemod #modbarbie #superstarbarbie #barbiesuperstar #love #barbielove #barbielovers

Ein Beitrag geteilt von Busy B from Germany (@busybfromgermany) am

Sieh dir diesen Beitrag auf Instagram an

In the last part of my lot you see two #skipperbody (s) , a Barbie body with #philippines #marking , a #funtimebarbie head and a #skipperhead as well as #two #skipperbody (s). I’m not sure at the moment what to do with this part of my #barbielot but I’m convinced that I can make new #exciting #videos for you from it. Do you have any wishes what you want to see`#loveyou #busybfromgermany #barbie70s #70sbarbie

Ein Beitrag geteilt von Busy B from Germany (@busybfromgermany) am

Be patient when you repair Barbie dolls

Nobody says it’s always easy with the repairs. Sometimes you just need patience. This is true in my case at the moment too. I have repaired a Barbie doll in the last weeks and then the right color for my repair was missing. I ordered acrylic colors and found out that they didn’t match. So I ordered another color from where I bought it the first time. Since it came from overseas I needed patience. Almost done and then the next problem. The second leg didn’t want to stay on the doll. The hip knob tends to break again and again due to old glue that was invisible and therefore hard to remove. Exhausting….. but nobody said it’s always easy to be a good Barbie doctor.