The Evolution of Barbie and Her Family: A Nostalgic Journey Back to the 1960s

Introduction of the evolution of Barbie and her family:

In the world of dolls, Barbie has undeniably left an indelible mark. Since her creation in 1959, Barbie has captivated the hearts of countless children and collectors alike. However, Barbie’s journey was not a solitary one. Throughout the 1960s, Barbie’s family grew, introducing a diverse cast of characters that added depth to her imaginative world. Let’s take a look back at the evolution of Barbie’s family during this iconic era and have a look at the evolution of Barbie and her family with a nostalgic journey back to the 1960s.

1959: Barbie, the Trailblazing Fashionista

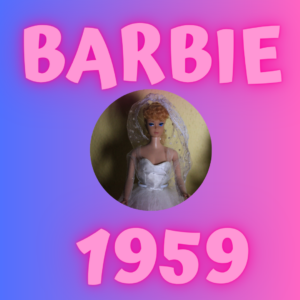
Barbie made her debut in 1959, breaking the mold with her stylish fashion choices and glamorous lifestyle. Created by Ruth Handler, co-founder of Mattel, Barbie was named after Handler’s daughter, Barbara. With her chic attire and sophisticated demeanor, Barbie quickly became a role model for young girls everywhere.

Picture with Barbie in Bridal dress, Barbie is from 1960 and has a blonde pony and ponytail
First Barbie from 1959

1961: Ken, Barbie’s Dashing Companion

Two years after Barbie’s introduction, Ken stepped into the spotlight. Named after Handler’s son, Kenneth, Ken became Barbie’s dashing companion. With his charm and impeccable fashion sense, Ken perfectly complemented Barbie’s elegance. Together, they embarked on countless adventures, capturing the imagination of children across the globe. I wrote an article about the early Kens last year which you can read here https://barbie.final-memory.org/ken-ken-or-ken

Photos of Barbie and Ken, Barbie wears a bridal dress, ken a casual t shirt and a pair of trousers
Barbie and Ken in 1961, the first evolution of Barbie and her family

1963: Midge, Barbie’s Best Friend

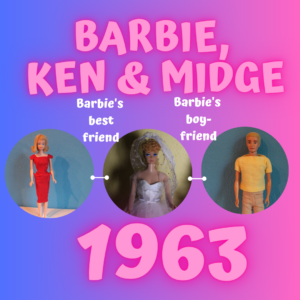
In 1963, Barbie welcomed her best friend, Midge, into her ever-growing circle. Midge was known for her vibrant personality and her infectious laughter. With her cheerful demeanor, Midge added an element of fun and camaraderie to Barbie’s world. The bond between Barbie and Midge showcased the importance of friendship and support.

The picture shows how the Barbie family grows, in 1963 Barbie gets a new best friend called Midge
Barbie got a best female friend, another evolution of Barbie and her family

1964: Skipper, Barbie’s Adorable Sister and Ken’s best friend Alan

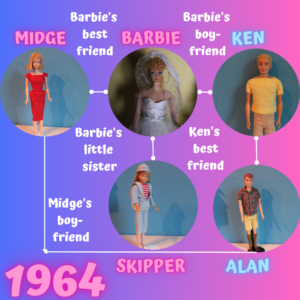
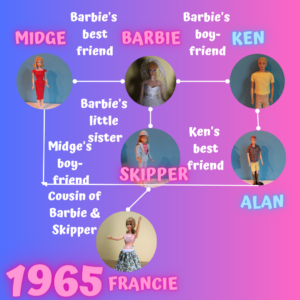
The following year, Barbie’s family expanded further with the arrival of Skipper and Ken’s best friend Alan, who is also regarded as the boyfriend of Midge. As Barbie’s younger sister, Skipper brought a youthful energy to the mix. With her playful spirit and trendy outfits, Skipper became a beloved character among young Barbie enthusiasts. Together, Barbie and Skipper embarked on countless sisterly adventures, fostering the importance of sibling bonds.

You can see all family members until 1964, starting with Barbie, to Ken, Midge, Skipper and Alan

Like Barbie, Skipper and Midge go out to the city, Alan and Ken also spend their free time together going hunting or for a Saturday night dance. Alan has the same size like Ken. They are designed to share their clothes. Alan is also the secret hero of Barbie – the movie, the one with his striped beach shirt that probably nobody outside the Barbie community can identify without problems.  Alan is easy to identify by his red hair. After being introduced in 1963 he disappears in 1967 and re-appears in 1990 to marry Midge after a friendship of almost 30 years. Isn’t that incredible?

1965: Francie, Barbie’s Fashion-Forward Cousin

Barbie’s cousin, Francie, made her debut in 1965. Known for her impeccable fashion taste and avant-garde style, Francie pushed the boundaries of fashion and became an inspiration for young trendsetters. Her presence in Barbie’s world highlighted the importance of individuality and self-expression.

Barbie family and friends in 1965 starting with Barbie & Ken to Midge and Alan to Skipper, Francie

1966: Tutti, Barbie’s Cherished Baby Sister and her twin brother Todd

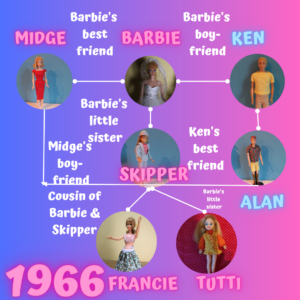
Barbie’s family was completed in 1966 with the arrival of Tutti and Todd, Barbie’s adorable baby sister and baby brother twins. With their innocent charm and tiny stature, Tutti and Todd captured the hearts of both children and adults alike. Tutti’s and Todd’s inclusion in Barbie’s world emphasized the importance of family and the joy that younger siblings bring.

Barbie family and friends in 1966 starting with Barbie & Ken to Midge and Alan to Skipper, Francie and Tutti

Conclusion:

Barbie’s journey through the 1960s was not just a personal one. It was a journey of growth, friendship, and familial love. As Barbie’s family expanded, so did the opportunities for imaginative play and storytelling. The evolution of Barbie and her family is not always easy to understand because a lot of member come and suddenly disappear again. For a deeper look at all friends I wrote an article many years ago Barbie doll wiki: What to know about Ken, Alan and the other male friends

Through the introduction of Ken, Midge, Skipper, Francie, and Tutti, Barbie’s world became more diverse and inclusive, reflecting the changing times of the 1960s. These iconic characters left an indelible mark on the hearts and minds of children, ensuring that Barbie’s legacy would endure for generations to come. In the late 60s the first black friends of Barbie were available. They are maybe worth another blog post since some friends are new in the Barbie world while others disappear again without any trace. Let’s hope that the evolution of Barbie and her family will continue in the future.

Barbie: A Journey From Perfect World to Real Emotions

Introduction to Barbie the movie: A Journey From Perfect World to Real Emotions

Last night, I had the opportunity to attend the pre-premiere of the much-anticipated Barbie, the movie at our local cinema. Can we consider it as a journey from the perfect world to real emotions ? As I walked into the theater, I was taken aback by the overwhelming crowd that had gathered for the screening. It seemed that the allure of Barbie had drawn in more visitors than anyone had anticipated. Excitement filled the air as the lights dimmed, and the movie began.

IMG 20230719 201811 1
Local cinema just minutes before the premiere

The Beginning – a perfect Barbie world?:

The movie opened with scenes already known from the trailer, giving us a glimpse into the magical and perfect world of Barbie. The visuals were stunning, showcasing a perfect Barbie land where every day was filled with joy and happiness. It was a world that many of us could only dream of. The attention to detail was remarkable, and it immediately captured the audience’s attention.

Barbie’s Owner and Real Emotions:

In the real world, Barbie’s owner was a young girl who loved her dearly. She played with Barbie, creating scenes and stories that brought her imagination to life. However, as the movie progressed, it became evident that the young girl had turned in a woman in her mid 40s who was feeling a sense of sadness in her real life. She mirrored the same emotions that Barbie seemed to experience in her perfect world which suddenly was not perfect anymore.

The Perfect World Shattered:

Unexpectedly, the perfect world that Barbie inhabited began to crumble. As Barbie’s owner faced challenges and hardships, Barbie could no longer ignore the real emotions that were surfacing within her. The once idyllic Barbie land was transformed into a world of chaos and uncertainty. It was a pivotal moment in the movie, as Barbie realized that she needed to venture into the real world to find healing and a deeper understanding of herself.

Barbie’s Journey to the Real World:

With determination in her eyes, Barbie made the courageous decision to leave her perfect world behind and embark on a journey into the real world. This marked a significant turning point in the movie, as Barbie stepped out of her comfort zone and embraced the challenges that awaited her. Ken smuggled himself into her pink car and joined her on the trip to the real world. The audience was captivated by the transformation that Barbie underwent, as she navigated the complexities of the real world with grace and resilience.

Ken caused chaos in Barbie’s perfect world and caused real emotions

Ken also discovered the real world in his own way. Finding the masculine world more than enticing he tried to import horses and patriarchy into the Barbie world with the idea to dominate it. After realizing that Ken wanted to take over Barbieland Barbie travels back with the Barbie owner that made her feel sad and her daughter to save the Barbie world from Ken.

Conclusion:

The Barbie movie, while having a somewhat trashy storyline, managed to strike a chord with the audience. It highlighted the importance of acknowledging and embracing our true emotions, even if they are not always pleasant. Barbie’s journey from her perfect world to the real world served as a reminder that healing and growth often come from stepping outside of our comfort zones.

As the credits rolled, the crowded cinema erupted with applause, a testament to the impact that Barbie had on the audience. Despite its flaws, the movie succeeded in delivering a powerful message of self-discovery and resilience. It left the viewers reflecting on their own lives, inspired to embrace their emotions and embark on their own journeys of healing. The secret hero in this play is however Allan.

In my opinion it’s also beneficial to know the characters from the 1960s until 1990s to understand the movie completely. Ruth Handler also appears as nice old lady living in the cellar of the Mattel headquarter. At the end we learn that Ruth was only a ghost since she died over two decades ago.

Keeping my promise – Barbie: A Journey from the perfect world to real emotions

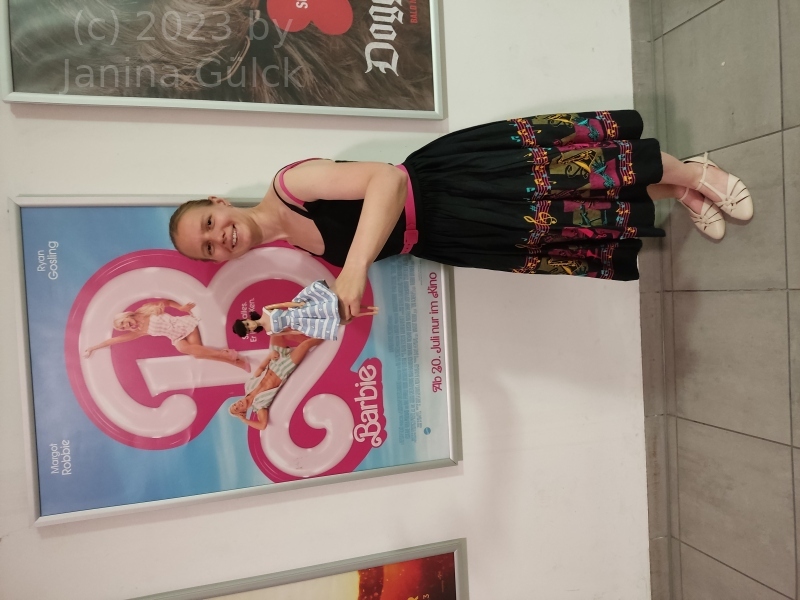
In my first article about the movie which you can read here https://barbie.final-memory.org/barbie-the-movie-and-tickets-for-a-pre-premiere/ I promised to wear my Pinup Couture dress and bring a Ponytail Barbie with me to the cinema. In my wildest dreams I hoped to find a pink box like some of you may already have seen via Facebook. However our cinema had no such pink box for photos and we had to improvise for the photo.

IMG 20230719 222756 1
In our local cinema without the pink box

Everywhere Pink

What we experienced was a whole cinema full with people dresses in pink. My dress has also a little bit of pink in it but it’s not completely pink. Yesterday pink seemed not to be a matter of age, just what the visitors imagined when thinking of Barbie. Maybe I’m a little bit old fashioned but I think the pink is a bit narrow-minded since Barbie represents at least for me more the the color pink.

A Halloween outfit for Francie doll?

Dressing Up Francie: A Halloween-Inspired Makeover?

So, Halloween just passed, and I found myself pondering whether to whip up a spook-tacular outfit for our beloved Francie doll. Now, I’ll admit, Halloween isn’t exactly my cup of tea – it’s not a huge deal where I’m from, you see. Here in Europe, we lean more towards celebrating St. Martin, crafting our own lanterns, and joining lantern processions, especially in the German-speaking regions.

But hey, I’m all about catering to my lovely viewers, and that’s where the idea for a new outfit for Francie came in. You see, I have this knack for experimenting with new clothing ideas for our petite Francie doll. She’s currently stealing the spotlight as my favorite doll to design for. While Barbie may have a plethora of patterns available, Francie often gets overlooked in the fashion doll realm. Outfits for Francie are my secret passion.

In my humble opinion, she’s a gem that deserves more attention. Sure, she may be smaller in stature, but her charm is undeniable. And that’s precisely why I relish in creating fresh ensembles for Francie – to showcase her unique flair and remind everyone just how special she truly is.

Stay tuned for the grand reveal of Francie’s latest Halloween-inspired look, and let’s continue to celebrate the beauty of fashion dolls, one stitch at a time.

IMG 7758
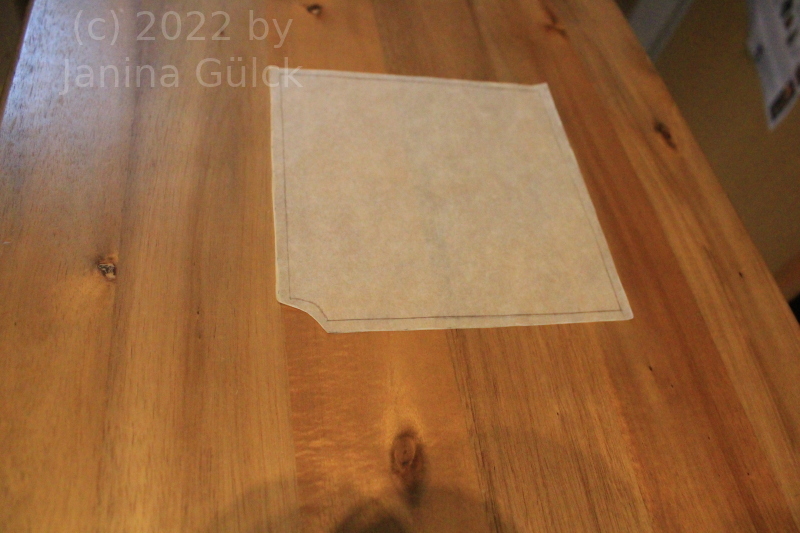
1/4 of the pattern for the Halloween skirt for Francie in a short version

Ideas that came into my mind for this Halloween outfit for Francie

As you all know, I have a soft spot for our adorable 15-year-old Francie doll, Barbie’s stylish cousin. With her endearing charm, Francie has become my go-to muse for sewing projects. However, I’ve noticed that my Francie doll’s wardrobe is in need of a little expansion. So, I’ve taken it upon myself to create unique outfits, honing my sewing skills and pattern-making expertise along the way.

For this particular project, I had a clear vision in mind – a chic yet effortless ensemble consisting of a simple skirt and a stylish top. I wanted to keep things uncomplicated, especially for those of you who may be new to sewing. That’s why I opted for a two-piece outfit, requiring just one calculation and one drawing to bring it to life. Trust me, simplicity is key here!

Inspiration struck when I envisioned a witchy skirt reminiscent of a dress I wore to my high school graduation ball. Drawing from my own creative experiences, I crafted a design that’s both easy to sew and oh-so-stylish. Rest assured, despite the stylish flair, this project remains incredibly straightforward.

So, join me on this sewing adventure as we whip up a fabulous new outfit for our beloved Francie doll. Let’s get creative together!

IMG 7757
1/4 of the pattern for the Halloween skirt/outfit for Francie in full length

A simple idea how to create the outfit

Let me share a little secret with you – creating Francie’s skirt and top ensemble is easier than you might think! With just a few simple measurements and basic sewing techniques, you can whip up this chic outfit in no time.

Here’s the drill: start by measuring Francie’s waist circumference and use that to calculate the radius needed for her skirt. It’s essentially the same process as designing a circle skirt, but with a twist – we’re working with rectangles this time. Picture it as almost a square, but with a cutout for the waist. Simple, right? For more information about Francie you can read more here https://barbie.final-memory.org/the-timeless-elegance-of-francie-with-straight-legs-a-journey-into-the-origins-of-doll-history/(opens in a new tab)

Once you’ve cut and sewn the four parts together, voila! Your skirt is ready to rock. And the best part? You can complete this project in under an hour. Yes, you read that right – just one hour!

I believe that with a genuine interest and a dash of creativity, anyone can master this sewing project. So, why not give it a try? Feel free to replicate my idea and embark on your own sewing journey with Francie. Who knows? You might even pick up a new skill or two along the way.

Francie doll, francie barbie doll, barbie cousin
Halloween outfit for Francie doll

You could also use it for Christmas when you do it in another color like red or green to make it very festive. You know I’m very flexible with my designs. Why not using them for another occasion?

DIY Tailor’s Ham in Barbie Size

The idea for the diy tailor’s ham in Barbie size

Welcome to today’s blog post, where I’ll be sharing with you my ingenious idea of creating a DIY tailor’s ham in Barbie size. Now, you might be wondering how this idea came about. Well, it wasn’t actually my own idea to create one. I stumbled upon it while browsing through YouTube, where I saw a tutorial for making tailor’s hams for taller fashion dolls. However, I couldn’t find any instructions specifically for Barbie dolls. So, I decided to take matters into my own hands and invent my own Barbie-sized tailor’s ham. In this blog post, I will guide you through the step-by-step process of creating this handy tool for your Barbie doll’s sewing needs.

Materials Needed:

Before we dive into the tutorial, let’s gather the materials required for this DIY project. Here’s what you’ll need:

1. A small piece of cotton fabric

2. Hamster bedding or cotton batting

3. Sewing needle and thread

4. Scissors

5. Measuring tape or ruler

6. Optional: fabric marker or chalk

Step 1: Preparing the Pattern

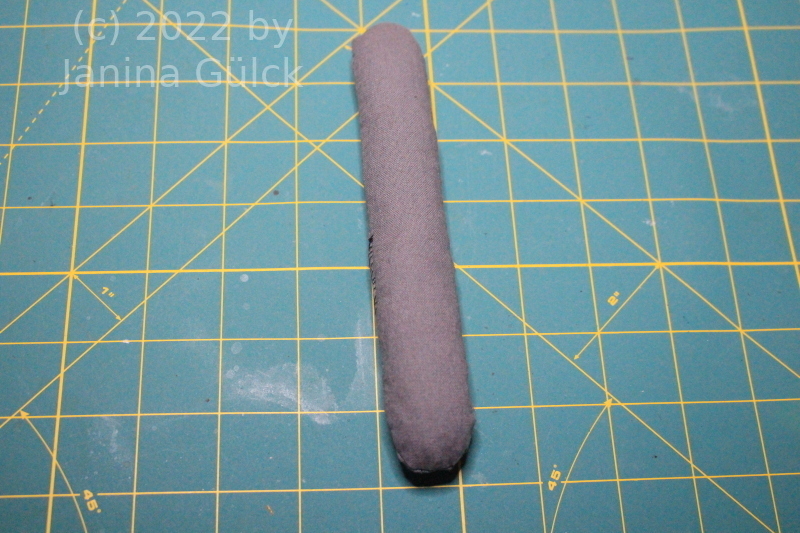
To start, we need to create a pattern for our Barbie-sized tailor’s ham. Measure and mark a rectangle on the cotton fabric, approximately 5 inches long and 3 inches wide. This will be the base of our tailor’s ham. Next, draw curved lines on the short edges of the rectangle, mimicking the shape of a traditional tailor’s ham. Cut out the pattern carefully.

Step 2: Sewing the Base

Fold the fabric in half lengthwise, with the right sides facing each other. Pin the edges together to secure. Using a sewing needle and thread, stitch along the curved lines, leaving a small opening at one end to allow for stuffing. Remember to backstitch at the beginning and end of your sewing to reinforce the stitches. Once you’ve completed the stitching, trim any excess fabric and turn the fabric right side out.

Step 3: Stuffing the Tailor’s Ham

Now comes the fun part – stuffing the tailor’s ham! Take small amounts of polyester fiberfill or cotton batting and gently stuff it into the opening of the ham. Use a pencil or the blunt end of a knitting needle to push the stuffing into the corners and ensure an even distribution. Continue stuffing until the tailor’s ham feels firm but still soft to the touch.

Step 4: Closing the Opening

Once you’re satisfied with the stuffing, it’s time to close the opening. Fold the raw edges of the fabric inside and neatly hand stitch the opening closed. Make sure your stitches are secure and hidden within the fabric.

Step 5: Finishing Touches

Congratulations! You’ve successfully created your very own Barbie-sized tailor’s ham. Give it a gentle shake to distribute the stuffing evenly and shape it into its desired form. Your tailor’s ham is now ready to be used for all your miniature sewing projects!

IMG 7737
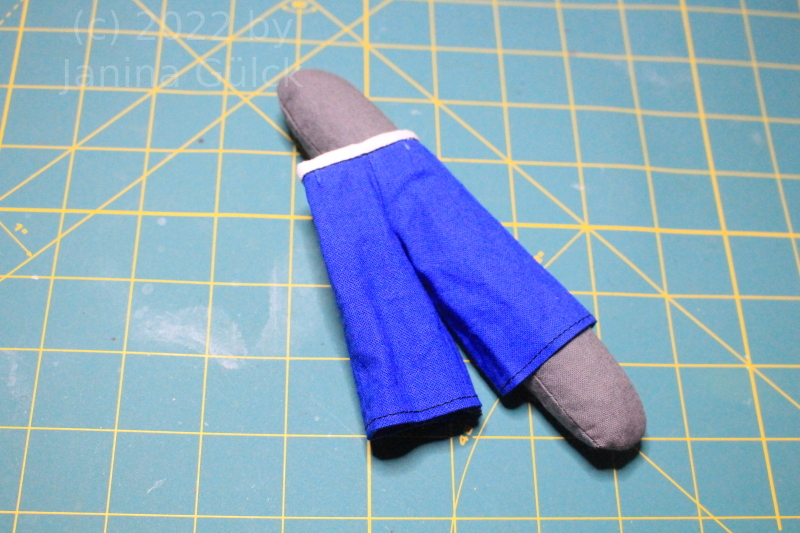
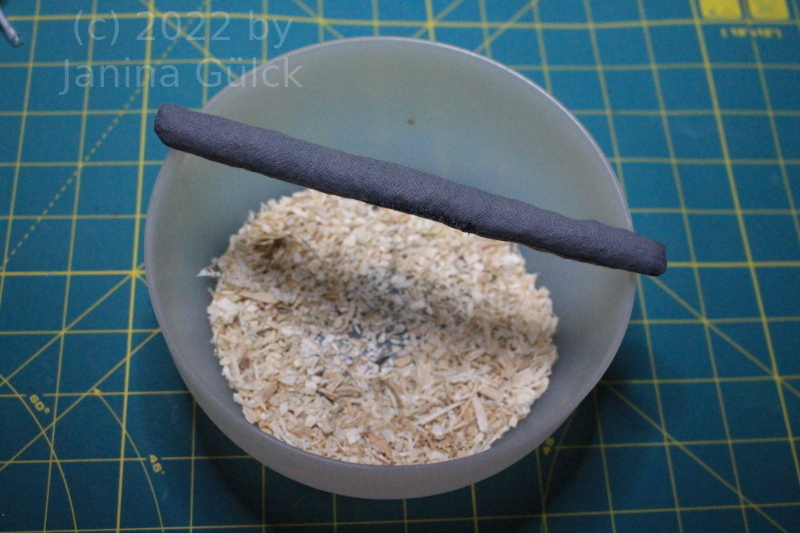
Francie shorts with diy tailor’s ham

If you can’t buy do the tailor’s ham in Barbie size or Francie size yourself

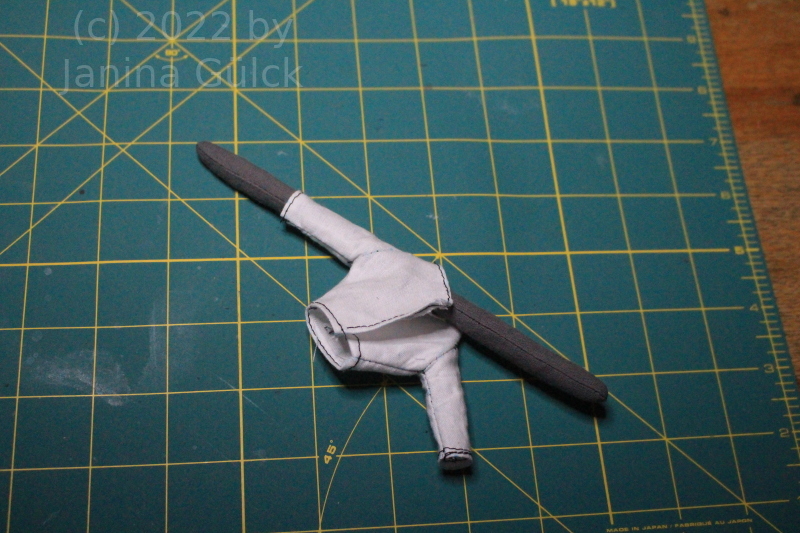
Yes, of course there are several videos about how to do your own tailor’s hams out there. It’s not very hard to do your own version of it but I needed a special form because a normal tailor’s ham is way to big for miniatures. I needed one for skirts and trousers and one for armholes. Armholes are the hardest to iron projects when you don’t have the right sewing supplies.

In the past I had the problem to put the arm through the armhole because the seam was in the way. I’m not perfect in doing arms and armholes. I’m still practising to come to perfection one day but for my projects it’s working at the moment. Just needed a way to improve my possibilities in supplies here. I hope this will make the process easier in the next projects.

IMG 7735
Tailor’s ham in Barbie size

I also have a mini ironing board for Barbie dolls but I have not used it often because the arm part did not fit the way I hoped it would. It’s a nice idea and for some projects it will work but not for all projects.

I hope that my idea helps you out there too to diy your own tailor’s ham without spending a huge amount of money. You can do it in any shape you like. It’s completely up to you. I don’t want to urge you to do it the same way I showed it here. You can tailor it to any size you may need and that’s one positive thing for me because you are not dependent on any industry.

IMG 7738
Diy tailor’s ham for arms in Francie doll size
How to do your own diy tailor’s ham in Barbie size

For those of you interested in the filling it’s something very easy. For tailor’s ham bedding is used like you can see in the pic below. It’s the stuff that you used for cages for Hamsters, Bunnies and so on. It’s easy to get and cheap. This was not my idea. In my research I used other videos and blog posts.

IMG 7739
Bedding used for tailor’s hams

Other diy tailor’s hams on youtube for taller fashion dolls and humans

In this blog post, we explored the world of DIY sewing tools for Barbie dolls and learned how to create our own tailor’s ham in Barbie size. Although the idea was not originally mine, I took inspiration from a YouTube tutorial and adapted it to suit the needs of our beloved fashion dolls. The tailor’s hams for humans were way too large and other youtube videos did not show their measurements. To solve the problem I played around a bit to find the right measurements and now, you can enhance your Barbie doll’s sewing experience with this handy and functional tool. So, gather your materials, follow the step-by-step instructions, and start creating beautiful miniature garments with your very own diy Barbie size tailor’s ham. Happy sewing!

DIY Fashion: A how to Make a pair of Shorts for a Fashion Doll

Introduction of how to make a pair of shorts for a fashion doll

Welcome to the exciting world of DIY fashion! In this blog post, we will delve into the art of making a pair of shorts specifically designed for a fashion doll. If you’ve been wanting to explore this creative endeavor but have encountered difficulties in creating the right pattern, fear not! We will guide you through the process and reveal the trick to easily creating the perfect pattern. Let’s get started!

This was a topic I really wanted to work on for a long while but pattern making patterns is always time consuming. I already did a pattern for a pair of pants in the begin of the year but it was not perfect and I did not find the time to improve my skills immediately. In another way I never lost the interest in how to make a pair of shorts for a fashion doll. I saw a video where you could learn how to make a pair of short for your doll from a skirt pattern.

DSC08556
A prototype pair of shorts for Francie

Materials for this project

Before we begin, let’s gather the necessary materials for this project. You will need:

  1. Fabric of your choice
  2. Scissors
  3. Sewing machine or needle and thread
  4. Measuring tape
  5. Pins

Step 1: Taking Measurements

To ensure a well-fitted pair of shorts, it’s important to start with accurate measurements. Carefully measure the fashion doll’s waist, hips, and desired length of the shorts. Note down these measurements for reference during the pattern creation and cutting stages.

Step 2: Creating the Pattern

Now that we have the measurements, it’s time to create the pattern for the shorts. Here’s the trick: start with a basic skirt pattern as a template and just adjust it a little. If you’ve had difficulties creating a pattern for normal trousers, don’t worry. We will simplify the process for you.

Begin by folding your fabric in half, aligning the selvage edges. Place the trouser pattern on the folded fabric, ensuring that the waistline matches the fold. Pin the pattern in place and carefully cut around it, resulting in two mirrored pieces. These will form the front and back of the shorts.

With this skirt pattern I tried to find my own mistakes from the beginning of the year. I knew my pattern was not perfect but I did not know where to start my improvements.

Francie doll, Francie Fairchild, Mod Francie, Barbie's cousin
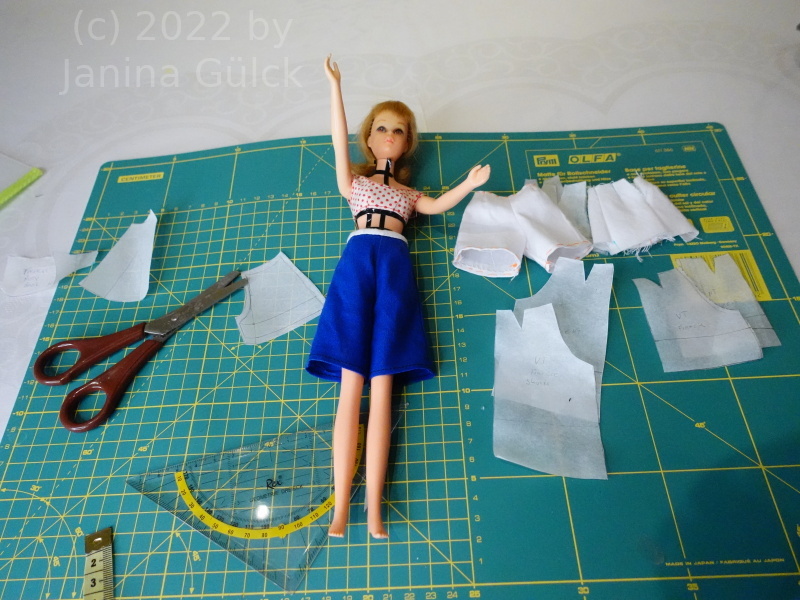
Francie with different patterns in different lengths

Step 3: Sewing the Shorts

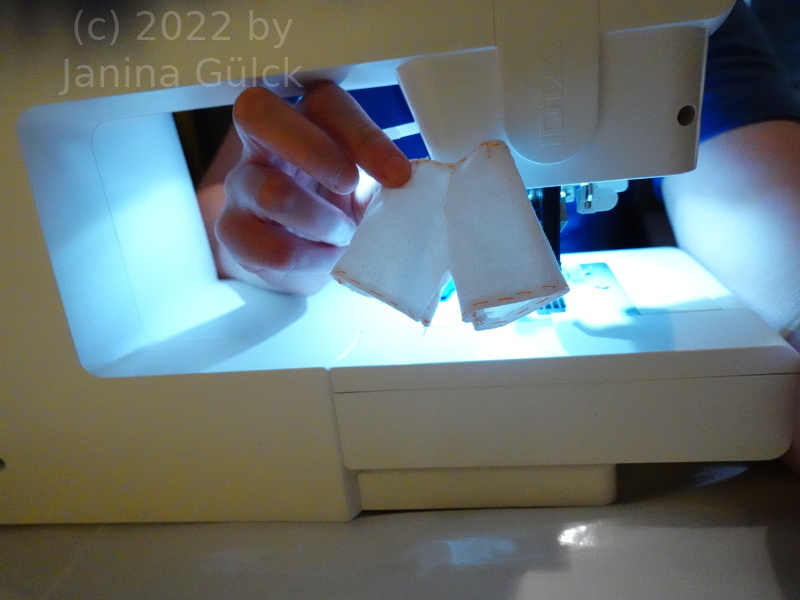
With the pattern pieces ready, it’s time to sew the shorts together. Place the front and back pieces together, right sides facing each other. Pin the side seams and inseams, ensuring they align perfectly.

Using a sewing machine or needle and thread, sew along the pinned seams, leaving the waistline and leg openings open. Remember to reinforce the stitches at the beginning and end of each seam. Trim any excess fabric and finish the raw edges with a zigzag stitch or serger.

My pattern fitted my Francie very well and so I decided to work on this pattern for my Supersize Barbie as well. The pattern on her also worked very well. So now at least I have created a basic for my future work of how to make a pair of shorts for your fashion doll.

DSC08313
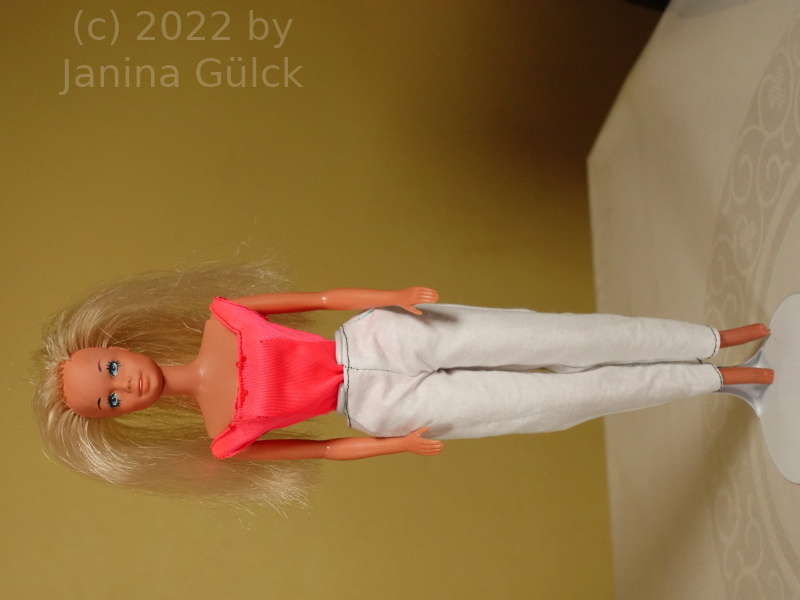
A pair of pants made by Busy B from Germany

Step 4: Adding the Waistband

To create a comfortable and secure fit, we will add an elastic waistband. Measure the doll’s waist circumference and cut a piece of elastic slightly smaller to allow for a snug fit.

Fold over the waistline of the shorts, leaving a small opening to insert the elastic. Thread the elastic through the waistband using a safety pin or elastic threader. Once the elastic is completely inserted, overlap the ends and sew them securely together. Finally, sew the small opening closed.

I think I got the basics now and I can make the length longer or shorter for the dolls I have here. I think that’s one of the most satisfying things you can see when you want to improve your abilities as a tailor.

DSC08562
Measuring Francie for the pattern

Step 5: Finishing Touches

To complete your doll’s fashionable shorts, take a moment to inspect for any loose threads or uneven seams. Trim any excess threads and press the shorts with a warm iron to give them a polished look.

If you want to learn how to do this very easy pattern transformation for your doll I can recommend you to watch the video below. It contains a step by step instruction how to do this yourself.

Conclusion of how to make a pair of shorts for a fashion doll:

Congratulations! You have successfully created a pair of stylish shorts for your fashion doll. By following our step-by-step guide and understanding the trick to pattern creation, you can now venture into the world of DIY doll fashion with confidence. Be sure to experiment with different fabrics, patterns, and embellishments to create a diverse wardrobe for your doll. Happy crafting!

How to make Skipper a full pony again

This week it’s more a personal story in my blog. I was asked about two weeks ago if I could have a look at a Pose n Play Skipper newly acquired by a German collector. I said sure because we have dealt with each other before. So she shipped her Skipper to me and half of the pony was missing.

P1000412
Pose n Play Skipper with partly missing pony

It was not question that I wanted to make her Skipper a full pony again. Her Skipper was obviously played often with and the hair was a bit oxided. It was not as obvious as when you see a Julia doll https://www.fashion-doll-guide.com/Julia-Barbie-Doll.htmlfrom the late 60s. This Skipper has no color magic hair https://www.myvintagebarbies.com/colormagic.htmbut her hair changed a bit over the decades. When you work with oxided hair it’s no problem to replace the missing hair. The hair itself is intact but the question is if you could find the 100% matching color. That’s a very hard task.

P1000441
Pose n Play Skipper after reroot with wild hair

The solution: I always keep the rests from my reroots and that came to my help here. I still had a rest of a matching color, maybe not 100% the same but at least 90%. You have to look very closely to find a difference in the colors and so I replaced the missing streaks with this rest.

Before I started my prep for “How to make Skipper a full pony again” I checked inside the head with my endoscopic camera. The hair inside was totally okay. I hoped to have this scenario because it’s a lot more work to secure the existing hair pattern first and having to fix it first. That’s really a lot of work and you have to concentrate while doing it.

P1000444
Skipper after partial haircut

I prefer to work in silence when restoring the dolls. Not all restorers prefer it this way but I do. Some work better when they have music, some not. I like music but not when I’m working like here. I can concentrate better on the reroot I do when working in silence. In general it was no problem to restore this Skipper because she was not problematic like having a neck split or other problems that could cause trouble during the work.

The hardest task in this restoration was to find a hair color matching with the existing hair. Giving her a new pony was not very hard. Yes, it’s time consuming but not hard. You need two hours of time during the reroot. Sometimes it’s not predictable if you have used enough hair or not. When you are missing a streak or two add them later. It’s possible to add more hair later when you are unsatisfied with your own work. You can add hair as long as you like your work and as long as you have hair.

P1000446
Pigtails are back, pony still has to be cut

How to get wild Barbie hair under control again

I bet you have all experienced this situation that you have a doll with wild Barbie hair and you did not know how to get them under control again. This happened to one of my viewers in the last weeks and he asked me if I could do a video with the content of how to get wild Barbie hair under control again.

DSC08523
Skipper with wild pony

To be honest I had two ideas in mind when he asked me and I realized that wanted to make a video about this topic but lost the idea somehow in my mind because I had so many other things I wanted to do in the meantime.

Working on a lot of parallel projects is something you have to do when releasing at least one video a week. No losing the overview is important. The video of how to get wild Barbie hair under control again was an easy one and very relaxing. The amount of time I needed for planning, taping and processing was manageable.

DSC08525

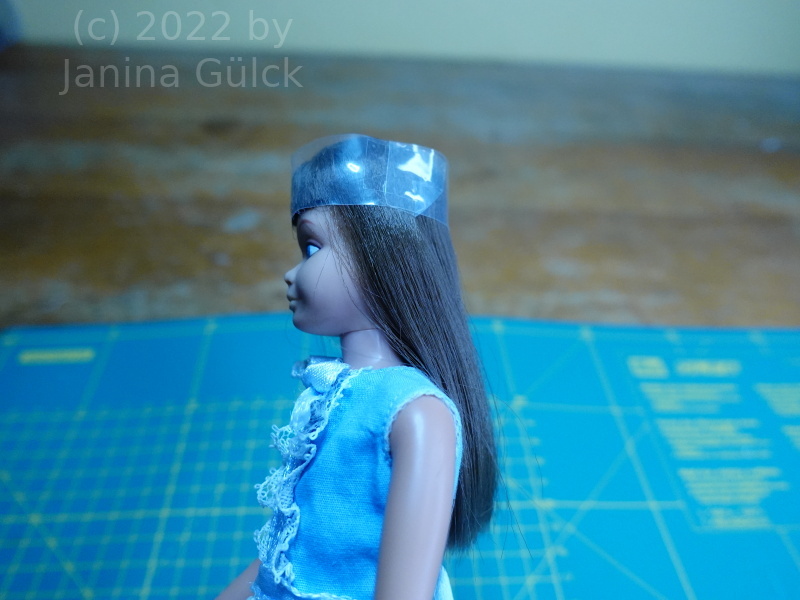
Using a special kind of rubber is what I think is the most useful thing for getting long and wild Barbie hair under control again. That’s at least my experience after 10 years of rerooting https://barbie.final-memory.org/my-first-barbie-reroot/ . The second little diy helper I show you here in my video is very simple to diy. You often get these little plastic caps when you buy used Barbie dolls or her sister or family. Let’s call this plastic thing cap. It’s very helpful when you have a doll with a short pony. These hairs have tendency to become wild and uncooperative. It may be in the nature of the short hair. Anyway but I have a solution for these wild hairs. It’s really easy and fun to craft these caps yourself.

DSC08527
Skipper’s wild pony under control
DSC08530
Barbie’s wild hair under control

Don’t forget to plan some weeks until you might have it finally under control. Sometimes the hair is really unwilling to cooperate. Sometimes it can last some months until you see a success.

How to remove stains from Francie dress

In the last weeks you have not heard from me every week. I was busy on other channel, not just doing videos but I continued to repair stuff for you. Last year I found a Francie ” First Formal” from the 60s. It’s great to have this outfit but it has also a negative side to own old fashions. Within the years light fabric gets stains and this was also the case here on my First Formal. I got some advice from senior collectors to be careful when cleaning it because the pink bow. You know Mattel did not pre-wash all the fabrics. From what I have seen and learnt along my repair journey they did it not with every fabric. So be very careful when you want to clean things. You may be lucky but often the fabrics start to bleed until you think they are completely discolored. In fact they are not but you just pre-washed them. Congrats.

DSC08488
Francie’s First Formal with stains

When you are in this situation you may think ” Great, I find a solution” or ” what the hell is happening here” or ” I wish I had never done this”. In the first part of the cleaning I literally thought “what the hell is happening” here. My idea to separate body and skirt was a total failure after my first attempts to clean the dress with soap, water and baking soda failed because of the delicacy of the fabric. After my first attempts it was clear to me that I did not get the success I wanted and I did not want to ruin the dress. Original Francie fashions are expensive in Europe. I decided to take the risk, remove the bow since it was the bleeding factor and I knew it before I started. I trashed all my plans in one moment and started to use Boost, a cleaner for old fabrics I bouth last year. It’s really good in getting stains out. I wasn’t sure if the upper blue top part would bleed but soon realized that it did not start to bleed. To my own surprise the luke warm water changed into a pee like color after not even two hours.

DSC08497
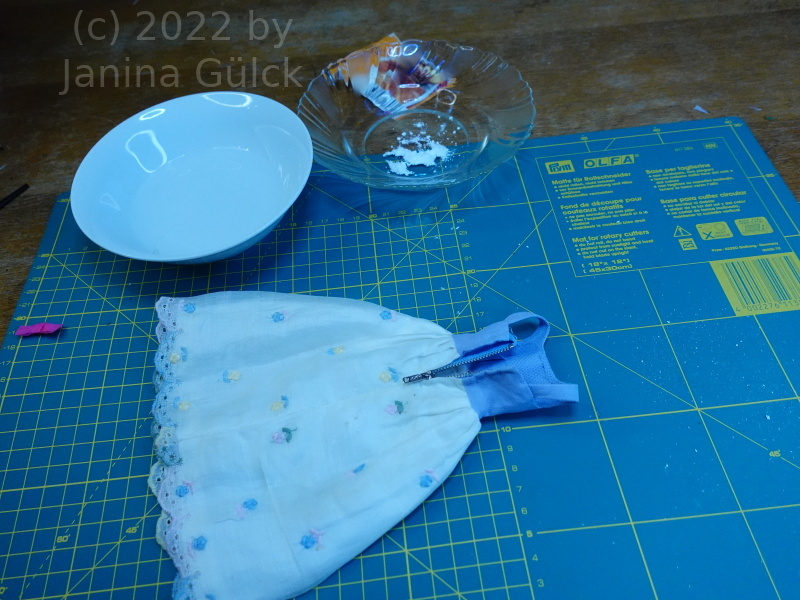
Francie’s First Formal before the boost procedure

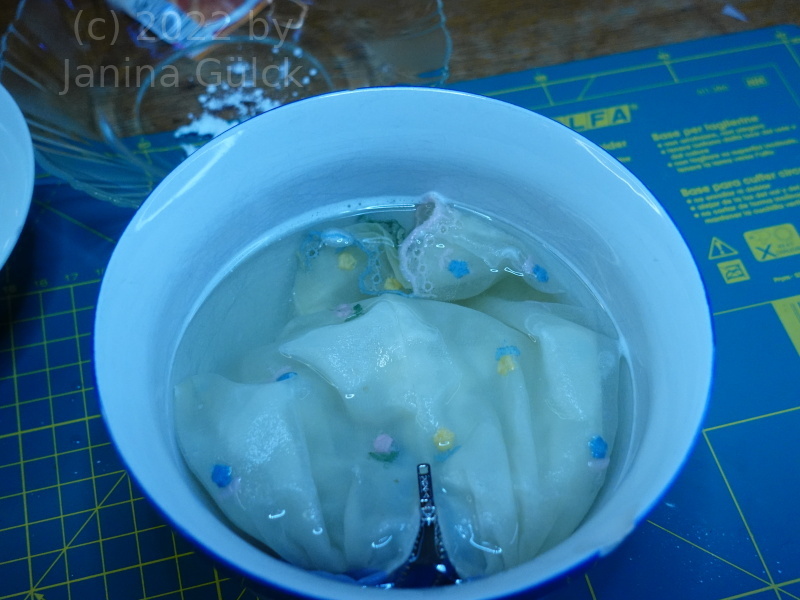
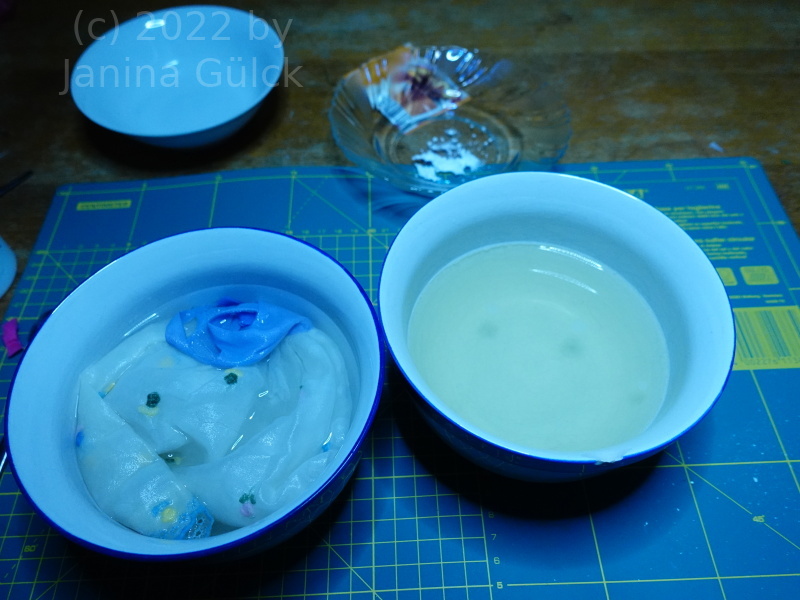
I let the Francie dress in there for at least 24 hours to remove all the stains and dirt from the last 5 decades. I used two bowls to get all the dirt out. After the stain removal the dress became completely white again. I thought it would have been designed as a cream tone. I did not expect it but it’s great. It’s great that all stains are gone now.

DSC08503
Francie’s First Formal in boost
DSC08507
Francie’s First Formal after 12 hours in boost

The leg repair of an Equestrienne Barbie

Last week I told you a little bit about the leg repair of a Talking Stacey and how easy it is to repair her fallen of legs. If you forgot to read about you can do it here https://barbie.final-memory.org/talking-barbie-and-her-leg-problem/

C1397T01
Successful leg repair of an Equestrienne Barbie

This weeks I would like to tell you a little bit about the leg repair of an Equestrienne Barbie and how easy her repair really is. I have done a video about this topic many many years ago when starting to do videos but until then no second Equestrienne Barbie crossed my way to do the repair another time. However I realized I got a pair of legs and a suitable body for the demonstration of this repair in the last months, had forgotten it completely.

C1390T01
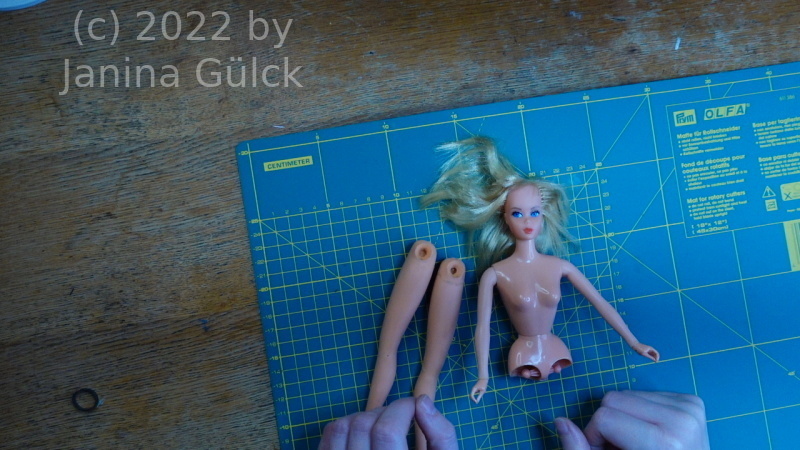
That’s Barbie without legs

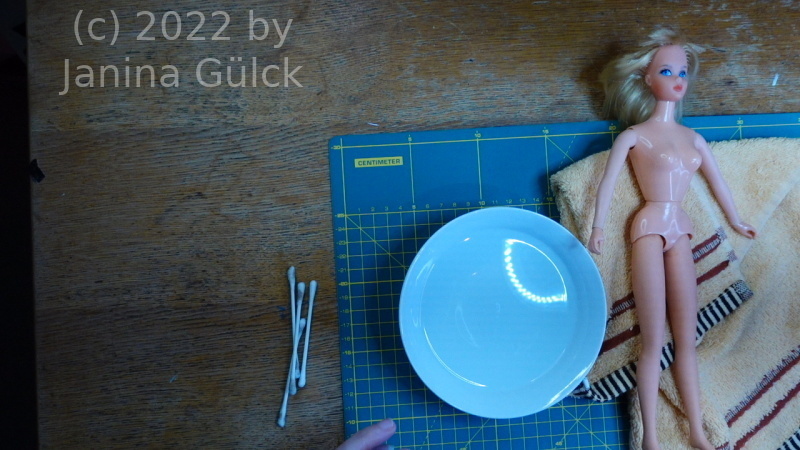
When searching in my workshop for new video ideas I found the semi-assembled Equestrienne Barbie just waiting for me. She was the one I was looking for. The good thing is that for this kind of Barbie doll the amount of time needed for the repair is very low. You can do it within 5 minutes when you are trained to do it. This is no joke. You don’t need more time for the leg repair of an Equestrienne Barbie. It’s very simple. You just need hot water, the legs, a little towel, the upper body and some minutes time.

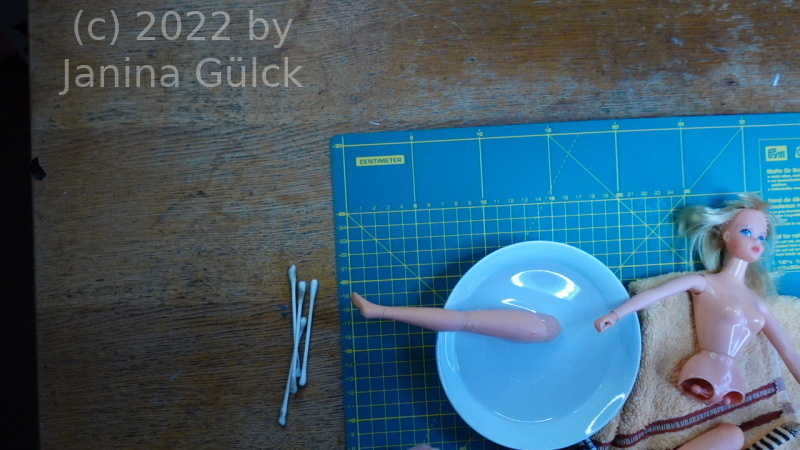
After putting the legs in your bowl with hot water you just need to wait until they become soft. You dry them with a towel. You know the problem that can appear when not doing it properly. Read more about it here https://barbie.final-memory.org/tutti-todd-and-their-problems/

C1396T01
Here we are in the middle of the repair

You dry the legs and them push them over the joints with some feeling. It’s really hard to explain how much to push and how much is too much. I suggest simply trying the leg repair of an Equestrienne Barbie. More than not being able to get the leg in the leg joint again can’t happen. Then you do it another time and it will find its way.

C1395T01
One leg reattached …

Talking Barbie and her leg problem

When you have a Talking Barbie from the late 60s you probably know the problem. Her legs fall off. Without a word, without any explanations. I don’t know how many of them were produced but I think up to 80% have this problem.

The fallen off legs were treated in different ways by different persons. Some re-glued the legs back to the body, some repaired the legs with screws. Be careful here when you want to repair the mechanism. When the screws are too deep in the body the Talking Barbie will never be able to talk again.

I admit I have seen some really creative solutions to the problem but seen from the point of view of harming a doll or not I got different answers to the problem. A lot of you emailed me about your experiences with Talking Barbie and the leg problem. Some told me they bought Talking Barbie legs and the legs fell off again a while. The ones glued back with Gorilla glue had the biggest problems. I have no idea in which decade it was done but now the arm and leg knobs seem literally to crumble away.

DSC08460 min
Here’s what I’m talking about. See an intact leg knob here ( in one piece again)

I can give you the advice to be careful when buying used Talking Barbie dolls. It’s often the easiest way to buy them from first owners who never reglued them to the body. You can be sure to fix them properly and you even have a chance to repair the mechanism ( if you are as crazy as I am).

Since I got so much feedback I wanted to make another Video about Barbie and how to fix her legs. It’s not really hard. You only need to have her broken leg knob piece, some MEK, a paintbrush and some patience. In my latest video you can see an instruction how to reattach the legs.

When you ask my about the cause of leg problem I can only assume that it could be a material weakness. The forces having impact on the leg knobs must be huge. We have two different materials here that have an impact on the leg. It’s the rubber of the leg and the Barbie body. I think they don’t like each other and that might be the reason for the reaction. Maybe you can imagine it like a magnet and the two don’t like each other. I hope this explains Talking Barbie and her leg problem a bit better to you.

DSC08470 min 1
Here’s our Stacey after the repair