Non-Existant Customer Service at Moda Fabrics for 2 meteres of fabric

Moda Fabrics is a well-known brand in the quilting and sewing industry known for its high-quality fabrics and beautiful designs. However, when it comes to customer service, there is a severe lack of support for the customers looking to purchase fabrics from them.

One of the main reasons why it is difficult to buy a fabric from Moda Fabrics is their outdated database on their website. The database lists dealers in Europe, but many of them no longer exist or are no longer selling Moda Fabrics. This makes it difficult to find a reliable dealer who actually has the fabrics in stock.

Searching for a European dealer on the website can be frustrating, as there are many entries that are no longer valid. This can lead to a lot of wasted time and disappointment for customers who are eager to purchase their desired fabric.

Asking Moda directly as a last try to get the fabric

When faced with a dead-end in their search for European dealers, some customers have resorted to contacting Moda Fabrics directly as a last attempt. However, this has proven to be a challenge as well.

The database on the website may provide contact information for dealers, but it is often outdated or inaccurate. This leads to long phone queues and unanswered emails, as customers try to reach out to Moda Fabrics for assistance with finding a dealer.

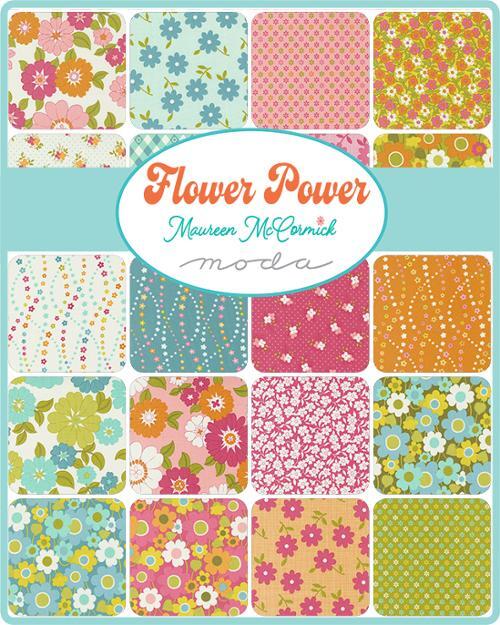
The lack of reliable customer service from Moda Fabrics makes it even more frustrating for customers who are genuinely interested in purchasing their products. It leaves them with the impression that Moda Fabrics does not prioritize the needs of their customers and is not interested in helping them find fabrics. In case you are interested here are all fabrics from the line

Flower Power Maureen McCormick
Flower Power Collection by Maureen McCormick 2023 by Moda fabrics

Last chance to buy Moda fabrics overseas

If customers are unable to locate a dealer within their region, they may have to consider purchasing their desired fabric from overseas. However, this option is not always ideal and comes with its own set of challenges.

Firstly, there is the added cost of international shipping. Shipping fabrics from another country can be expensive, especially if there is limited availability or limited quantities available. This can add a significant expense to an already costly purchase.

Furthermore, customers may have to deal with twice the VAT if they purchase from an overseas dealer. This is because customs authorities may charge import duties and taxes when fabrics are brought into the country. This can significantly increase the overall cost of the purchase and make it less appealing for customers.

In conclusion, the non-existent customer service at Moda Fabrics poses a significant challenge for customers looking to purchase their fabrics. The outdated database on their website makes it difficult for customers to locate dealers, and the lack of support from Moda Fabrics themselves adds to the frustration. If customers are unable to locate their desired fabric within Europe, they are left with the option of buying it from overseas, which can be costly and inconvenient. Moda Fabrics needs to address their customer service issues in order to provide a seamless shopping experience for their customers.

My personal story why I wanted to buy some Moda fabrics

You know I love to sew for Barbie and all her family member. I always search for fabric that fits from the pattern for Barbie. It’s not always easy to find enticing fabric for me. The patterns are often too large or too childish for my sewing projects. That’s why I often search at Etsy or other global stores to get an idea what’s on the market. The last local store for fabric purchase is not equipped well and they don’t order if you search for a special fabric they don’t have in store.

In my case it was two fabrics I liked from the “Flower Power” fabric collection from 2023. I’ve hardly ever experienced such a bad customer service and believe me the customer service in Germany is already non-existent.

https://www.pinterest.de/pin/259027416062826875/

Solutions to the Moda fabrics problems

Several weeks have elapsed since I began addressing the issue with Moda fabrics. After thorough research, I’ve discovered a cost-effective alternative solution that won’t break the bank at a minimum of €100 for two meters of fabric. While awaiting feedback on this idea, I promise to keep you informed about the progress of my solution. Given these developments, it appears that Francie & Barbie will soon be adorned in delightful new attire, thanks to the promising prospects on the horizon.

My version of the Moda fabric

Introducing the Colorful Riley Blake Barbie Malibu Fabrics Collection

Introduction: Seeing the colorful Riley Blake Barbie Malibu fabrics collection

Yesterday, while browsing through Instagram, I stumbled upon some exciting news for all the Barbie enthusiasts out there. Riley Blake, the renowned fabric company, is launching a brand new fabric collection dedicated to none other than the iconic Barbie herself. Named “Malibu Barbie,” this collection is set to captivate us with its vibrant and eye-catching designs.

The colorful Malibu Barbie fabric collection takes inspiration from the classic Barbie dolls of the 1980s, bringing back fond memories of our childhood. What sets this collection apart is its unique feature – hand-painted drawings reminiscent of the vintage Barbie doll boxes. These drawings have been skillfully incorporated into the fabric designs, adding a touch of nostalgia and charm. Sadly these boxes disappeared in the late 1980s and are only known to those who were children back then, those who got them from older relatives or those who are collectors.

Reminded by the Riley Blake Malibu Barbie fabrics collection on own childhood

The colors used in the Malibu Barbie fabric collection are nothing short of stunning. With its bright and playful palette, this collection is sure to bring a burst of joy and energy to any project. From cheerful pinks and purples to vibrant blues and greens, these fabrics perfectly capture Barbie’s fun-loving spirit and her signature style. Almost a kind of art all by itself. I discovered the colorful Riley Blake Malibu Barbie fabrics by accident just after having seen the Barbie movie in Summer 2023. Barbie – the movie and tickets for a pre-premiere

Whether you’re a seasoned seamstress or a passionate crafter, the colorful Riley Blake Malibu Barbie fabrics collection is a must-have for every Barbie lover. The versatility of these fabrics allows for endless creative possibilities. Imagine designing trendy clothing pieces, adorable accessories, or even delightful home decor items inspired by the beloved Barbie dolls.

Wonderful idea to revive the comic Barbie style from the 1970s and 1980s in the Riley Blake Barbie Malibu fabrics collection

Not only are these fabrics visually appealing, but they also boast Riley Blake’s renowned quality. Crafted with utmost care and using premium materials, the Malibu Barbie fabrics are made to last. Their durability ensures that your creations will stay vibrant and beautiful for years to come. I’m convinced that I will buy at least a Jelly roll of the colorful Riley Blake Barbie Malibu fabrics collection. Unfortunately these farbrics are not available as single pieces but only as a Jelly roll via amazon. Since shipping from the USA is too expensive for a piece of fabric I hardly see any other chance than buying it there.

If you’re looking to add a touch of nostalgia and playfulness to your sewing projects, the colorful Riley Blake Malibu Barbie fabrics collection is the perfect choice. Get ready to dive into a world of vibrant colors and classic Barbie charm. Let your imagination run wild and create something truly special with these delightful fabrics.

https://www.pinterest.de/pin/55169164179547695/

Conclusion

In conclusion, the colorful Malibu Barbie fabric collection by Riley Blake is a true celebration of Barbie’s timeless appeal. It brings together the best of both worlds – the charm of the 1980s Barbie dolls and the high-quality craftsmanship that Riley Blake is known for. So, gather your sewing tools and unleash your creativity with these colorful and nostalgic fabrics. Let the Malibu Barbie collection inspire you to create something truly magical!

DIY Tailor’s Ham in Barbie Size

The idea for the diy tailor’s ham in Barbie size

Welcome to today’s blog post, where I’ll be sharing with you my ingenious idea of creating a DIY tailor’s ham in Barbie size. Now, you might be wondering how this idea came about. Well, it wasn’t actually my own idea to create one. I stumbled upon it while browsing through YouTube, where I saw a tutorial for making tailor’s hams for taller fashion dolls. However, I couldn’t find any instructions specifically for Barbie dolls. So, I decided to take matters into my own hands and invent my own Barbie-sized tailor’s ham. In this blog post, I will guide you through the step-by-step process of creating this handy tool for your Barbie doll’s sewing needs.

Materials Needed:

Before we dive into the tutorial, let’s gather the materials required for this DIY project. Here’s what you’ll need:

1. A small piece of cotton fabric

2. Hamster bedding or cotton batting

3. Sewing needle and thread

4. Scissors

5. Measuring tape or ruler

6. Optional: fabric marker or chalk

Step 1: Preparing the Pattern

To start, we need to create a pattern for our Barbie-sized tailor’s ham. Measure and mark a rectangle on the cotton fabric, approximately 5 inches long and 3 inches wide. This will be the base of our tailor’s ham. Next, draw curved lines on the short edges of the rectangle, mimicking the shape of a traditional tailor’s ham. Cut out the pattern carefully.

Step 2: Sewing the Base

Fold the fabric in half lengthwise, with the right sides facing each other. Pin the edges together to secure. Using a sewing needle and thread, stitch along the curved lines, leaving a small opening at one end to allow for stuffing. Remember to backstitch at the beginning and end of your sewing to reinforce the stitches. Once you’ve completed the stitching, trim any excess fabric and turn the fabric right side out.

Step 3: Stuffing the Tailor’s Ham

Now comes the fun part – stuffing the tailor’s ham! Take small amounts of polyester fiberfill or cotton batting and gently stuff it into the opening of the ham. Use a pencil or the blunt end of a knitting needle to push the stuffing into the corners and ensure an even distribution. Continue stuffing until the tailor’s ham feels firm but still soft to the touch.

Step 4: Closing the Opening

Once you’re satisfied with the stuffing, it’s time to close the opening. Fold the raw edges of the fabric inside and neatly hand stitch the opening closed. Make sure your stitches are secure and hidden within the fabric.

Step 5: Finishing Touches

Congratulations! You’ve successfully created your very own Barbie-sized tailor’s ham. Give it a gentle shake to distribute the stuffing evenly and shape it into its desired form. Your tailor’s ham is now ready to be used for all your miniature sewing projects!

IMG 7737
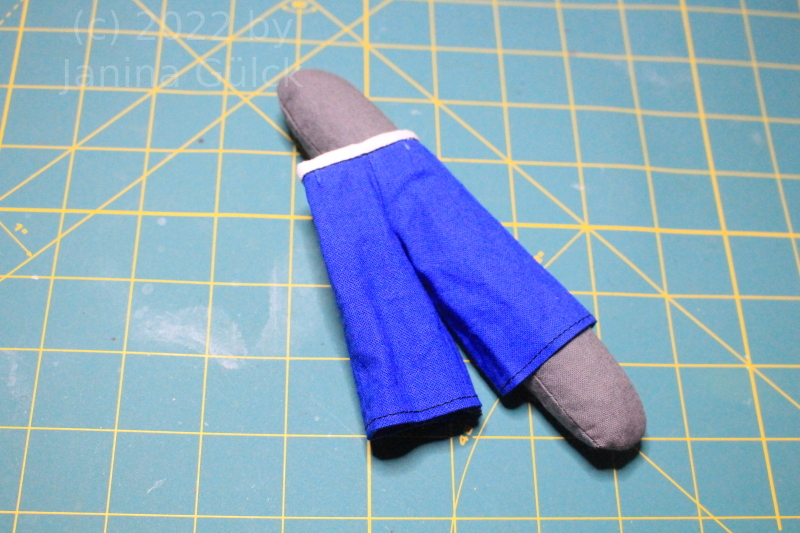
Francie shorts with diy tailor’s ham

If you can’t buy do the tailor’s ham in Barbie size or Francie size yourself

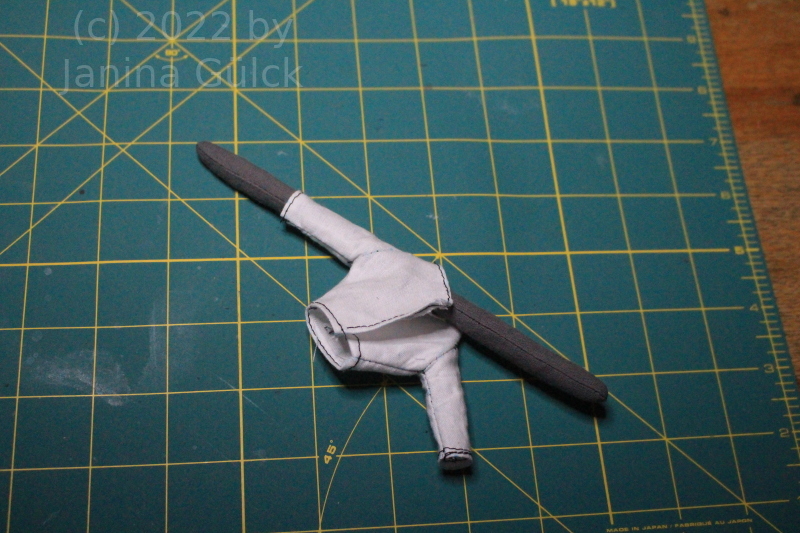
Yes, of course there are several videos about how to do your own tailor’s hams out there. It’s not very hard to do your own version of it but I needed a special form because a normal tailor’s ham is way to big for miniatures. I needed one for skirts and trousers and one for armholes. Armholes are the hardest to iron projects when you don’t have the right sewing supplies.

In the past I had the problem to put the arm through the armhole because the seam was in the way. I’m not perfect in doing arms and armholes. I’m still practising to come to perfection one day but for my projects it’s working at the moment. Just needed a way to improve my possibilities in supplies here. I hope this will make the process easier in the next projects.

IMG 7735
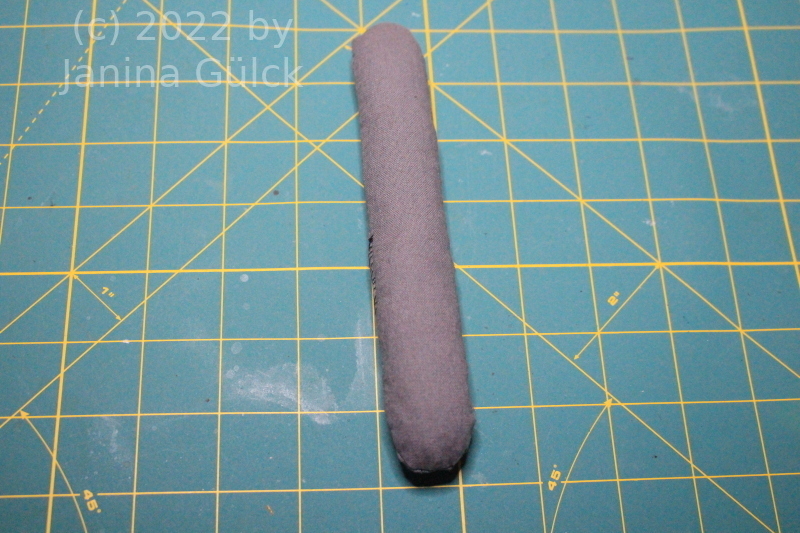
Tailor’s ham in Barbie size

I also have a mini ironing board for Barbie dolls but I have not used it often because the arm part did not fit the way I hoped it would. It’s a nice idea and for some projects it will work but not for all projects.

I hope that my idea helps you out there too to diy your own tailor’s ham without spending a huge amount of money. You can do it in any shape you like. It’s completely up to you. I don’t want to urge you to do it the same way I showed it here. You can tailor it to any size you may need and that’s one positive thing for me because you are not dependent on any industry.

IMG 7738
Diy tailor’s ham for arms in Francie doll size
How to do your own diy tailor’s ham in Barbie size

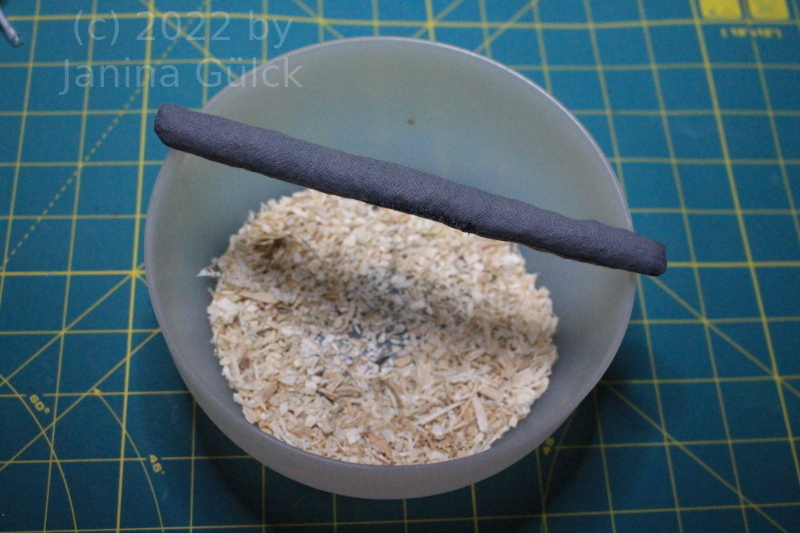
For those of you interested in the filling it’s something very easy. For tailor’s ham bedding is used like you can see in the pic below. It’s the stuff that you used for cages for Hamsters, Bunnies and so on. It’s easy to get and cheap. This was not my idea. In my research I used other videos and blog posts.

IMG 7739
Bedding used for tailor’s hams

Other diy tailor’s hams on youtube for taller fashion dolls and humans

In this blog post, we explored the world of DIY sewing tools for Barbie dolls and learned how to create our own tailor’s ham in Barbie size. Although the idea was not originally mine, I took inspiration from a YouTube tutorial and adapted it to suit the needs of our beloved fashion dolls. The tailor’s hams for humans were way too large and other youtube videos did not show their measurements. To solve the problem I played around a bit to find the right measurements and now, you can enhance your Barbie doll’s sewing experience with this handy and functional tool. So, gather your materials, follow the step-by-step instructions, and start creating beautiful miniature garments with your very own diy Barbie size tailor’s ham. Happy sewing!

Diy your own miniature lanterns for Barbie and her 11 1/2 inch size sisters

Introduction – how the idea for the miniature lanterns for Barbie came

In the last years I’ve done a lot of repair videos and sewing stuff but what most viewers of my audience don’t know is that I also have done a lot of paper crafts in the last decades. This started way back when I was in Kindergarten. Our teachers tried to improve our skills in working with paper, cutting, being creative and having fun with it. So this was literally something I grew up with. My mother and I did a lot of creative crafts until I became a teenager. It’s not that I stopped liking it but somehow this went into the background and we only had limited space to decorate the apartment and the Christmas tree. We also did hand painted eggs for Easter and lanterns for November.

My crafter side

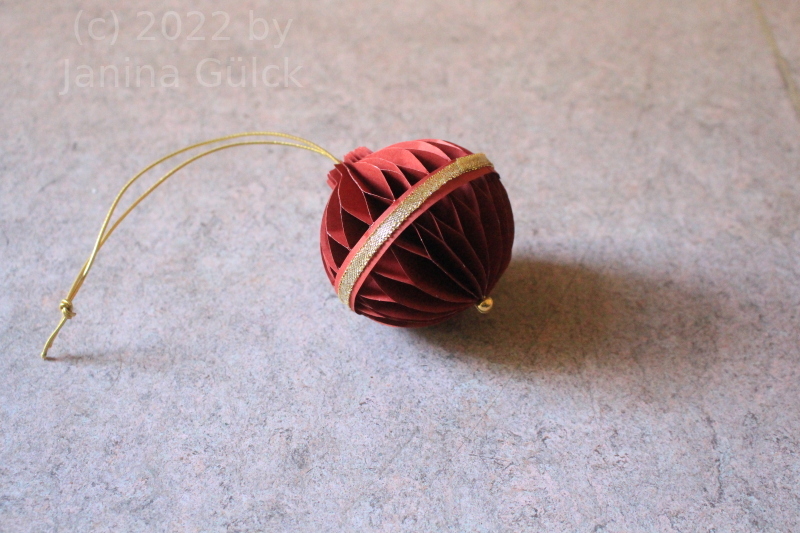
This article is possibly more from my crafter side than from my collector side but sometimes it’s really hard to divide because there are no borders. You can work in every part if you want. I hope I’m not boring you but my parents showed me a lot concerning being creative. It’s more a kind of lifestyle than just using it to survive. I can post you a pic of what I did for the upcoming Christmas season. A part of it is already at my parents house because they visited us last month and I made a little parcel with all the things I’ve done in the past months.

IMG 7733
Christmas tree ornament done out of thin cardboard

Making your own lanterns in Kindergarten and Elementary School

In Kindergarten and Elementary School it’s very popular to make your own lanterns. Every year a lantern procession is done on 11th of November to celebrate St. Martin of Tour. The legend says he once shared his red cloak in a snowstorm with a beggar and so he became Saint Martin instead of just Bishop Martin. The story is taught in every Elementary School in the German speaking areas of Europe. Maybe it’s spread wider but I have not been there in school.

When I was little Halloween was something completely unknown to us. We did not know and we did not celebrate it. I’m not the biggest fan of Halloween either. That’s why I did a moderately inspired video about a Halloween outfit for Francie last week. http:// https://youtu.be/JWPlI4Gz_K8

St. Martin’s Day

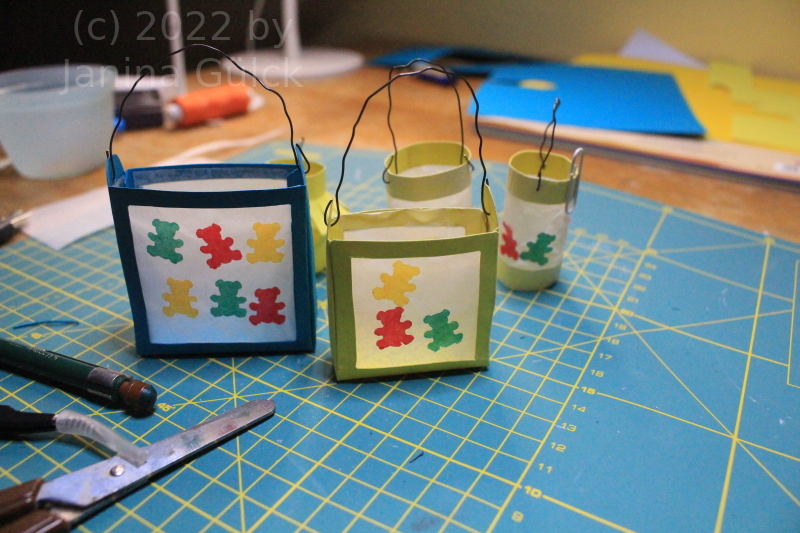
Somehow I was reminded that St. Martin is coming up and I decided to take the idea a little further and teach you a little bit about diy lantern making. Since I have a channel for Barbie and Barbie related topics I decided to make a video of how to diy your own miniature lantern for Barbie dolls. Normal lanterns are way to big for using them for dolls. That’s where the idea to show you this kind of tradition to diy your own miniature lantern for Barbie and her 11 1/2 inch size sisters comes from. The lantern procession is kind of our counterpart to Halloween. It’s almost the same time. The main audience is children. Some of them come in costumes. Singing is very important but they don’t stop at every door to get sweets. The procession is rather peaceful and the parents also attend the procession. You can bring as many relatives as you have. The more you have the funnier the whole procession is. Normally the procession starts in a school yard, then moves through some residential areas and then they go back to the school yard. The lanterns are often made in arts and crafts lessons.

IMG 7728
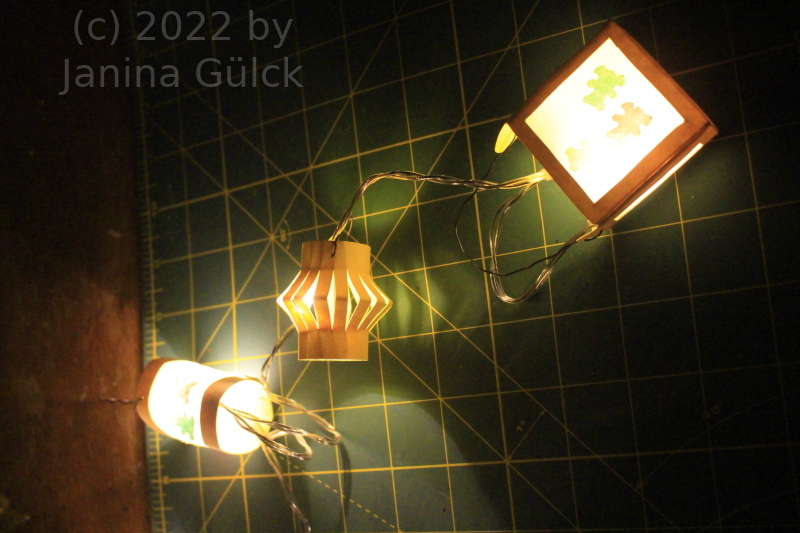
Miniature lanterns made out of cardboard and grease proof paper

The help of my parents with the lanterns

My parents worked with me on special lanterns. One year I had a shining sun lantern, another year a rocket lantern. You can basically do anything you like. As you can imagine the school children have often more complex lanterns than the younger children still in Kindergarten.

This whole topic made me think if I should do a video for you not only showing you how to diy your own miniature lanterns for Barbie and her sisters but also give you a little background why I have not invested so much effort in the Halloween outfit for Francie but into lantern making. I hope you understand it and I’ve made you a little more curious in how to diy your own miniature lanterns. A nice lantern is an enrichment for every doll house.

IMG 7729